How to create page in WordPress ? In this blog, we will study how to add Pages to WordPress. Adding pages is similar to adding posts in WordPress. Pages are static content and often do not change it displayed information. Following are a few simple steps to add a new page in WordPress. Click on Pages and then click on Add New as shown in the following image. In this WordPress editor, each paragraph, image, or video is presented as a distinct “block” of content. Each block comes with its own set of controls for changing things like color, height width alignment, and much more. These will show and hide automatically when you have a block selected. All of the blocks available to you live in the Block Library. You’ll find it wherever you see the + icon. Add Page Title Add the title of the page, like Contact. The title of your page should be descriptive of the information the page will contain. Choose a helpful page title. If you have Permalinks set up, WordPress will use your page title as the permalink of your page. The permalink is the actual URL or web address of the page. Choose a Block or Start Writing After you add your page title, it’s time to add some content. Content can be anything you choose from headings, text, images, lists, videos, tables, and lots more. To see the available blocks for your page be sure the Top Toolbar is showing or Click the button to add the appropriate block WordPress Content Block Blocks are the basis of all content within the WordPress page editor. Here are all the blocks you can use on your WordPress Page Paragraph: The paragraph block allows you to easily craft content and is the default block type for text added to the editor. It is probably the block you will use most. Image: The image block allows you to insert an image into your content via upload, Media Library, or URL. Heading: Adds heading (h2, h3, h4, h5, h6,) to introduce new sections and organize content to help visitors and search engines understand the structure of your content. Gallery: Display multiple images in a rich gallery. List: Add a bulleted or numbered list. Quote: Give quoted text visual emphasis. Audio: Embed a simple audio player. Cover: Add an image or video with a text overlay- great for the header. File: Add a link to a download file. Video: Embed a video from your media library or upload a new one. WordPress Page Settings On the right side of the WordPress page editor, you’ll see the document setting for your page. This contains some important settings for your page, so let’s go through them Status and Visibility The Status and Visibility section contains details about how and if your page is viewable. Visibility allows you to select between three options. Public Visible to everyone Private Only visible to site admins and editors. Password Protected Make the page only viewable with a password you choose. only those with the password can view this page. How to schedule when your WordPress Page will be published The Publish setting allows you to either choose “immediately” or a date in the future page to publish. If you want to schedule your page to be published in the future, you can use the time and date picker to choose your preferred publication time. If you want your page to publish immediately, then leave this setting to immediately. This means when you hit the blue publish button at the top of the screen, your page will immediately go live. Permalinks Permalinks are short for “permanent link”. This is the field where you can customize the last part of the URL of your new page. For SEO reasons, it’s a good idea to choose a slug that matches the title of your page rather than a random string of numbers or characters. Be sure to select pretty permalinks in your WordPress Settings. Featured Image Depending on your page theme, the featured image of your page may be used in several ways ( like on your home page, for example, in a gallery-style listing of pages) Upload an image that “describes” your new page here. Featured images are also used by social media platforms like Facebook and Twitter as the preview image for the page if you share a link to your new page. Page Attributes The Page Attributes section applies a parent page and template to your new page. For the Parent section, you can arrange your pages into page hierarchies. For example, you could create this new page with additional pages under it. Or you could place your new page as a child page beneath an existing page. Template Some WordPress themes have custom page templates, so the next Template section allows you to apply a template to your new page. The Order box allows you to order your page numerically. Pages are usually ordered alphabetically, but you can choose your order by entering a number in this field. Save Drafts or Preview your Page As you complete work on your new page, you have a few options. Use the left-hand links at the top of the screen. You can save a draft of the page, which will save the page and your work on it into a draft. To Preview the page one last time, click the Preview button. This will open a new tab in your browser where you can view how your page will look once it is live. Publish your WordPress New Page Once you have finished adding content, sizing images, and proofing your page, it’s time to publish Preview it one last time and then click the publish button. You’ll be able to double-check your settings one last time before publishing. Once you’ve published, you’ll see a confirmation that the page is now live, along with the page address. Click the view page or copy the link to
Author: Raj Mehmood
Best 5 Tips for Creating an Unforgettable Personal Brand It is very annoying, but there is no gain Around it: You need a personal brand may you succeed in 2024. Even if you are one. Budding businessman, corporate Professional, or creative freelance, your branding is key. Make yourself known to potential employers and partners. So, we have five suggestions that will help you build a brand. Find out what makes you unique Maybe it’s nothing. If so, go out and be unique, and then come back and read this article. But if you are unique, ask yourself why. What sets you apart? Your unique value proposition is the core personal brand. Are you a tech titan, a marketing expert, or a person who thinks chaos is dumb? Identify what makes you unique and build your brand around it. Social Media Everyone hates social media, but that doesn’t mean it isn’t useful. Social media is a powerful tool for brand building. Choose platforms that fit your professional goals and audience. And if you can’t figure out which one to choose, choose them all. This is what makes a successful brand. It’s exhausting, but it gets a lot of work done. Create Good content Create and share content that matters to your audience. Whether it’s podcasts, videos, or blog posts, your content should reflect your expertise and interests. Just make it a lot. And try to have a visual element. which is huge these days, it seems. And Good Connections Building a personal brand is not a lonely journey. Network with professionals in your field, attend industry events and don’t shy away from collaboration. Partnerships with other brands or influencers can provide mutual benefits and increase your visibility. Don’t ignore your audience, either they are kind of the whole point. Be Prepared for Change Digital is the only constant change in the world. Always be adaptive if you will. Whether it’s new social media algorithms, emerging platforms, or changing consumer behavior, being flexible and aware will keep your brand relevant. Review your strategy regularly what’s working and what’s not. It’s really fun because if something isn’t working, you’ll let it go, which is always a good time for me. As 2024 unfolds, the importance of a strong personal brand only increases in the professional landscape. Whether you’re just starting or trying to redefine yourself, these tips offer a roadmap to a more impactful and resonant personal brand. Remember that every tweet, post, and Pod is a brushstroke in the masterpiece that is your professional identity, and remember that this particular analogy would probably crush monet. Does not matter We won’t read this Sharing is Caring!
Insert Media In WordPress In this blog, we will learn how to Insert Media in WordPress. Media files can be inserted into your Pages or Posts from libraries, from local storage, or from URLs. Following are the steps to Insert Media in WordPress. Step 1: Click on Posts Add New in WordPress. Step 2:Click on the left side plus button and cursor hover on the Media. you want to insert in your post. Step 3: You can select the files from the Media tabs as shown in following screenshot. Information about the select media files will be displayed on the right side of the screen under the Attachment Details. Click on the Insert Post button, the image will be inserted into the post. In the Attachment Details section, you will find information about the image such as URLs, Title, Captions, Alt Text, and Description you can also insert an image directly from your system by clicking on the Upload Files tab. Click on Insert into Post button Sharing is Caring!
Edit Media In this blog, we will learn how to Edit Media in WordPress. You can manage all the information about your media that is saved in the media library. Following are the steps to Edit Media in WordPress. Step 1: Click on the Media Library and click on the name of the media item or the edit link. Step 2: You will view a list of media files. Select any one image to edit. Step 3: You can view the edit media page with a few options on the right side. URL: You read only a link from media files. Title: This Displays the name of the media. The title is often shown in galleries and attachment pages if themes or plugins are designed to display it. Permalink: Permalink is the URL of the media attachment page. This is also a link to view the attachment page. Edit image button: This allows you to edit the image position, such as rotate counterclockwise, rotate clockwise, scale, crop, flip vertically, and flip horizontally. Caption: A brief explanation of the media. Alternate Text: The alt text for an image, which is used to describe media. Used for availability. Description: An explanation of your media file. Delete Permanently: Delete your media files permanently. Step 4: Once you complete editing the required fields, click on the Update button to save changes made to an image. Sharing is Caring!
How to add media files ? In this blog, we will learn how to add media files in WordPress. WordPress allows you to add, all kinds of media files like videos, audio, and images. Following are the steps to add media. Step 1: Click on the Media Add New in WordPress. Step 2: Then Click on the Select Files Option to select the files from your local storage as shown in the following image. Step 3: Add media files such as images and audios by selecting them and click open as shown in the following images. Step 4: You can view the list of media files added shown in the following. After clicking on publish, your posts get published for the user to view it. Sharing is Caring!
Learn about the Media Library of WordPress In this blog, we will study what is media library in WordPress. Media Library consists of the images, audio, videos, and files that you can upload and add to the content when writing a post or page. Here you can view, add, edit, or delete any media-related objects if not needed. Following are the steps to understand Media Library. Step 1: Click on the Media Library in WordPress Step 2: You can view media files like images, audio, and videos. Click on the Add Media button. Step 3: The upload new media page gets displayed. You can learn how to add media in the next section. Step 4: You can view a bar as shown in the following image. The Various tabs that appear have the following functions. List View: Displays the images and videos in list form. View Grid: Displays all images in the Grid Format as shown in the following screen shot. Filter the images and videos: Filters the images and videos. Search Box: Helps to search images by inserting the name into the box Sharing is Caring!
How to Add Posts in WordPress? In this blog, we will study how to add posts in WordPress. Posts are also known as articles and sometimes referred to as blogs or blog posts. These are used to Popularize your blogs. Following are the simple steps to Add Posts in WordPress. Step 1: Click on Posts Add New in WordPress. Step 2: You will get the editor page of the post as shown in the following screen. You can use the WordPress WYSIWYG editor to add the actual content of your post. We will study in detail about WYSIWYG editor in the chapter WordPress Add Pages Following are the fields on the editor page of the Add Posts Page. Post Title: Enter the title of the post, i,e, Post1. Post Content: Enter the content of your post. Step 3: Click on the Publish button to publish your respective post. Following are the few other options present in the publish section. Save Draft: It saves the post as a draft. Preview: You preview your post before publishing. Move to Trash: Deletes the Post. Status: Change the status of your post to published, pending, or Reviewer Draft. Visibility: Change the visibility of the post to public, Private, or Password protected. Published: Change the published post date and time. How to Edit Posts in WordPress? In this section we will study to how to edit posts on WordPress. Following are the simple steps to edit Posts in WordPress. Step 1: Click on Posts All Posts in WordPress. Step 1: You can view Post1 was created in the previous sections How to add posts in WordPress posts. When the cursor hovers over the posts, a few options get displayed below the Post name. There are two ways to edit the Post i .e Edit and Quick Edit. Edit Click on Edit options in Post1 as shown in the following screen. You can edit or change the content or title of the post as per your need, and then click on the update button as shown in the following screen Quick Edit Click on the Quick edit option in Post1 as shown in the following image. Here you can edit the Title, Slug, and date of the posts and can also select the categories for your post as shown in the following image and then click on the Update button to confirm post edits. How to Delete Posts in WordPress? In this section we will learn how to Delete Posts in WordPress. Following are the steps to Delete Posts in WordPress. Step 1: Click on Posts All Posts in WordPress. Step 2: You can Delete post1 was created in the previous section how to add Posts in WordPress. When the cursor hovers on the posts, then a few options get displayed below post1. Click on Trash option to delete the posts. Step 3: You can view your post lists to confirm if the above post is deleted. How to Preview Posts in WordPress In this section, we will learn how to Preview Posts in WordPress. Preview Post is to view the post before it is published to the user. It is safer to Preview your Post and verify how your post looks on the website. You can edit or change the posts as per your need after Previewing. Following are the simple Steps to Preview Posts in WordPress. Step 1: Click on Posts All Posts in the WordPress Dashboard. Step 2: You can view Post 1. When the cursor hovers over the post, then a few options are displayed below the post name. Click on the View options as shown in the following image. Or else you can view your post directly while editing or adding a post by clicking on the preview button as shown in the following. Step 3: You can view your post when you click on view or preview. How to Publish Posts in WordPress? In this section, we will learn how to Publish Posts in WordPress. Published is used to make the posts available to all the users wherein every user can view that particular post. Publishing a new post in WordPress is an easy Process. Step 1: Click on Posts Add New in WordPress. Step 2: You will get the editor page of the post as shown in the following image. You can use the WordPress WYSIWYG editor to add the actual content of your Posts. Step 3: Click on the Publish button to Publish your respective post. After clicking on publish, your posts get published for the user to view it. Sharing is Caring!
How to add categories in WordPress Site In this blog, we will study how to add Categories to the WordPress site. Category is used to indicate sections of your site and group-related posts. It sorts the group content into different sections. It is a very easy convenient way to organize the posts. To Access the Category section, follow some simple steps- Step 1: Click on the Posts Categories option in WordPress. Step 2: The Categories page is displayed as shown in the following snapshot. Following are the details of the field on Categories. Name: Enter the unique name of the categories Slug: A word chosen to describe your post. It is specified in the tags URL. Parent: By selecting the parent category from the dropdown, you can set the particular category as a sub-category or keep it as None. Description: Add a brief description of your category. It is optional. Step 3: After filling in all the information about categories, click on the Add New Category button. Step 4: After clicking on Add New Category, the newly created category will be displayed on the right side of the page as shown in the following screen How to edit WordPres Categories In this blog we will study the simple steps to Edit Categories in WordPress. Following are simple steps to edit categories in WordPress. Step 1: Click on Posts Categories in WordPress. Step 2: You can view the Category that was created in the top section of How to add WordPress Categories. When the cursor hovers over the categories, then a few options are displayed below the Category name. There are two ways to edit the categories i.e. Edit and Quick Edit Edit = Click on the Edit option in the Categories section as seen in the following image. You can edit any of the required field, and then click Update button as shown in the following image Category fields are same from the section WordPress Add Categories. Quick Edit= Click on Quick Edit option in Categories sections as shown in the following image Here, you can only edit the Name and Slug of the Category as seen in the following screen and then finaly click on Update Category button How to delete Category in WordPress Now we learn how to Delete Categories in WordPress. Following are simple steps to delete categories in WordPress. Step 1: Click Posts Categories in WordPress. Step 2: You can delete the Category that was created in section WordPress Add Category. When the cursor hovers over the categories, a few options are displayed below the category name. Click on the Delete button as shown in the following screen When you click on delete, you will get a pop message asking for confirmation to delete the particular category as shown in the following image Sharing is Caring
Ministry of Defence Announce Multiple Job Vacancies in Pakistan The Ministry of Defence has announced various jobs for various roles related to the plans to “Establishment Technology” Assessment Lab in Islamabad. Interested candidates are encouraged to apply online through their official website as the posts are on a contract basis. Positions Available Director CC Lab Senior Smart and SW Evaluator Senior Hardware Devices Evaluator Senior Network Evaluator JR. Smart and SW Evaluator JR. Hardware Devices Evaluator Jr. Network Evaluator Support Staff Driver Application Process Applicants who meet the requirements are requested to apply online using the template application form available on this official website. www.njp.gov.pk. Applications must be submitted within 15 days of publication of the advertisement. Applications must be submitted completely as incomplete applications will be returned. Selection Process Only those shortlisted will be contacted for an interview. The Ministry prioritizes gender equality and has the power to refuse appointments or cancel appointed posts. Candidates who are currently working for the Government have to produce a valid NOC at the time of interview. Contract Basis Appointments should be made under contract. The Ministry plans to fill these posts to help build a technology assessment lab and advance technological capabilities in the defense industry. With the possibility of an extension for an initial year based on performance. review Sharing is Caring!
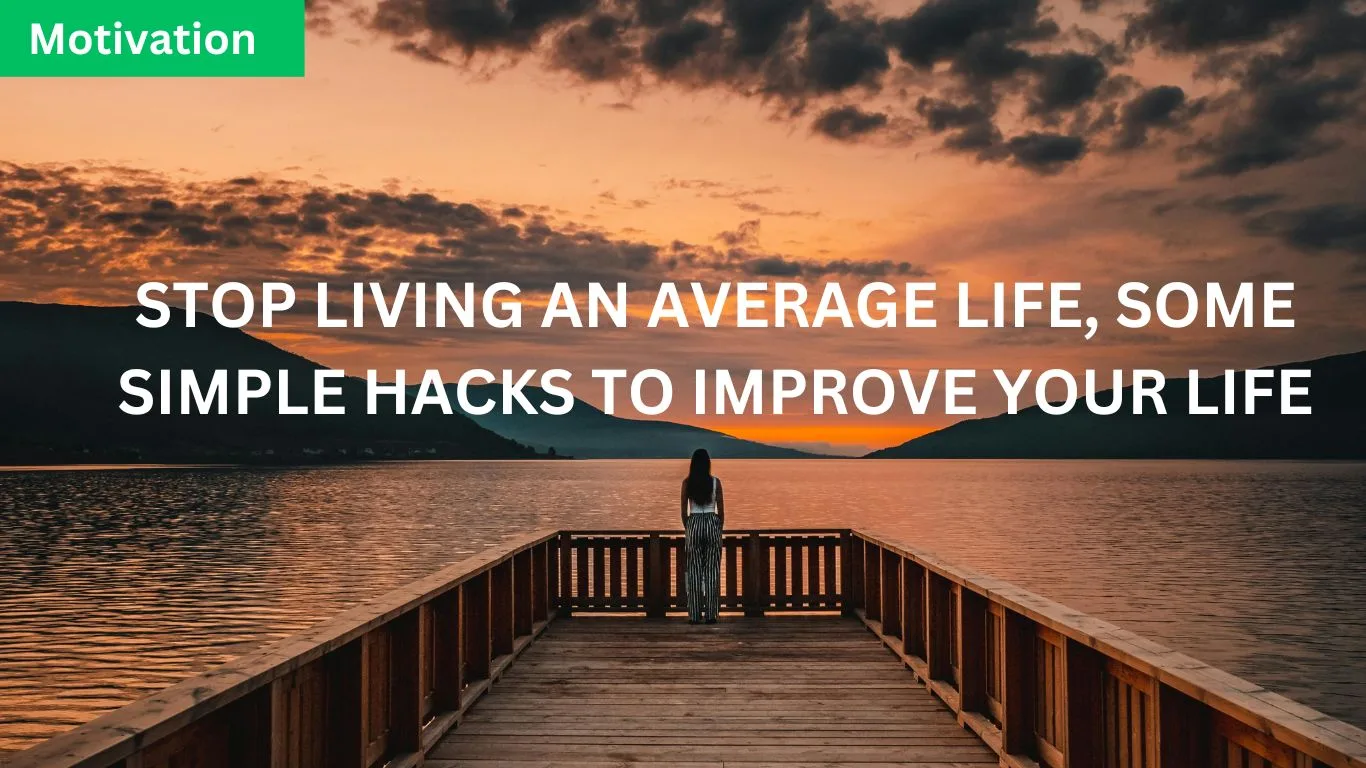
Stop Living An Average Life, Some Hacks To Improve Your Life In movies, that is always the case character that grabs your attention, like no other. The character has some sort of ability, either in the form of super strength, metal armor, or some other trait that can be used to advantage. This character always finds a way to beat the odds and overcome the challenges faced. But when the movie is over you never find any of these qualities in real life. Your mind tells you that you are an average person and live an average life, unlike the movie characters who are an average human and live an average life. Deep down you sometimes feel that there is more to you than just being an average person. These are things that can help you live the life you want instead of living an average life. The following are steps to avoid living an average life. Control Your Power Many people live their lives according to the instructions of others. They easily give their power to the hands of others and let them take control of their lives. That way you can’t make big decisions that help you get the most out of your life so you don’t have to blame others for living an average life. You must take back control of the consequences, and direct your life in the direction you want it to go, and thus you will be able to change your world. Have a firm belief in yourself In today’s society, most people grow up without any opinion or expression of their own. Failing that believe in your thoughts can completely change the way you live your life. Therefore, you must believe in yourself and believe that the ideas you have are unique and no less than anyone else’s ideas. Believe in yourself and know that it is impossible not to achieve your goals. Write Down Your Goals We have to take another step towards loving the life we want and that is to write down the goals and ideas that we have in our mind it is not enough to write them down, you also need to stick to them. This is because when we don’t write down our goals and ideas, we often forget about them and never remember them again, but writing them down and looking at them every single day reminds you again that your day is over. Has a purpose and it is this purpose that supports all the smaller goals to achieve greater success in your life Get Out Of Your Comfort Zone The final step to breaking out of mediocrity is breaking out of the shell you’ve been living in for so long, which means you have to break free from your comfort zone and make changes in your life. Get outside of your thoughts and expand your horizons because these are the things that will help you live the life you want Sharing is caring!
