In this blog, we will learn how to use plugins in your WordPress website. Plugins allows to easily customize, modify, or enhance WordPress post or blog. The WordPress plugin is a software that can be uploaded to expend the functionality of the WordPress site. They add services or features to WordPress blog. Plugins are used to make your work easier. Following are the simple steps to add plugins.
Step 1: On the left side bar Click on Plugins, Installed Plugins as shown in the screen.
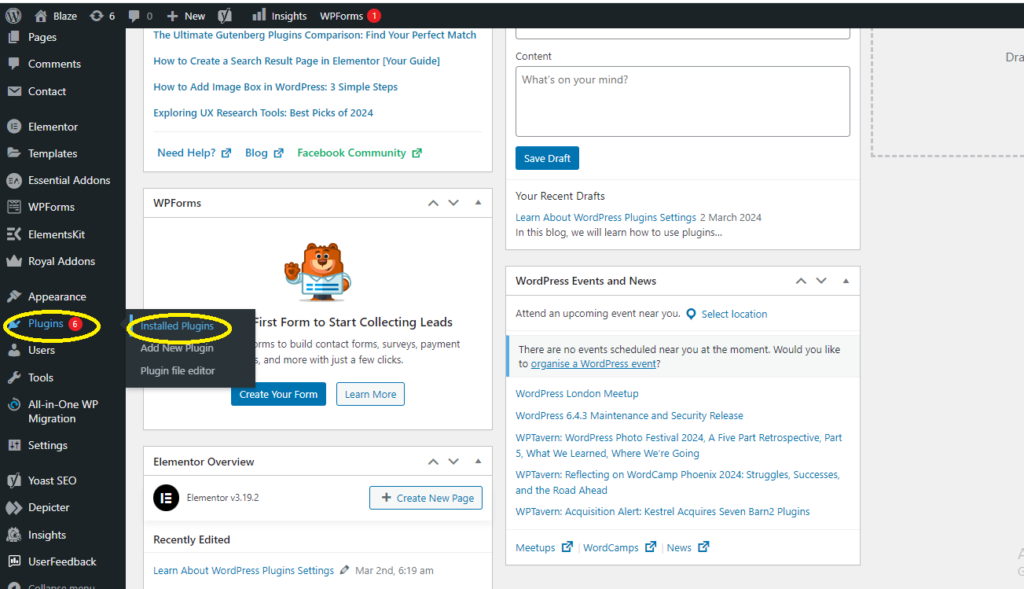
Step 2: The Following page will appears.
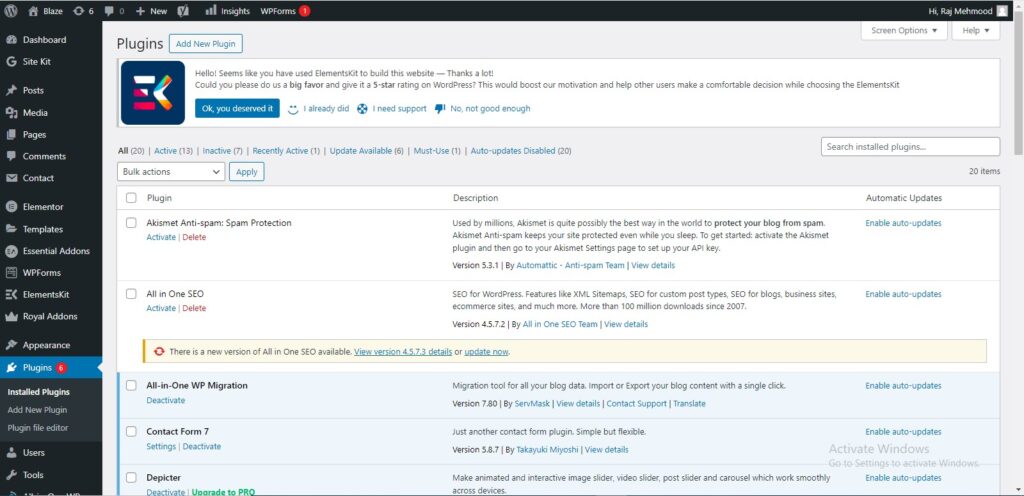
On this page, you can view already installed plugins
Step 3: Click on Plugins and then Click Add New menu as shown in the following screen
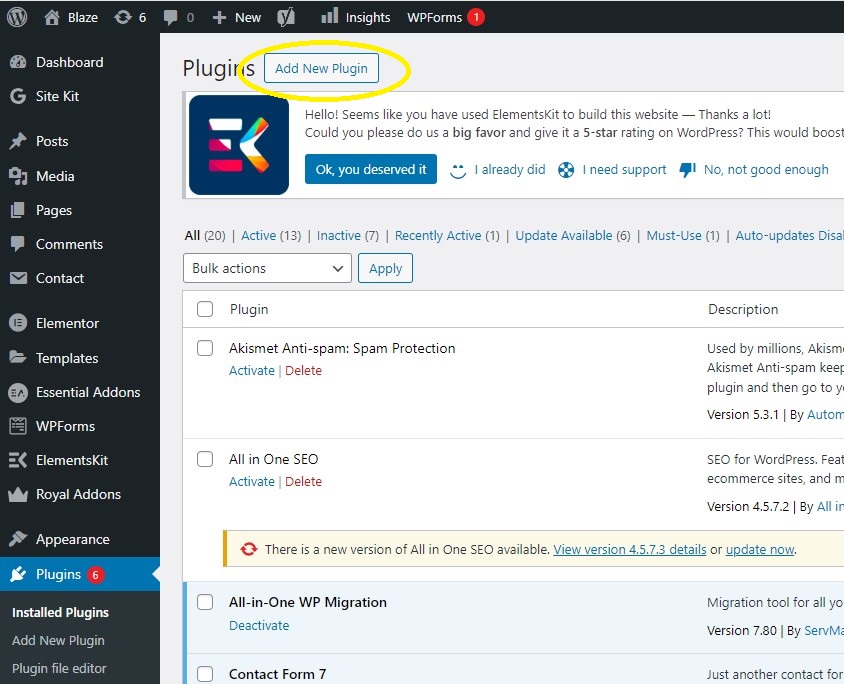
Step 4: A list of plugins appears that are used in WordPress. Here you can directly install plugins from the available list or you can upload them by clicking on upload plugin.
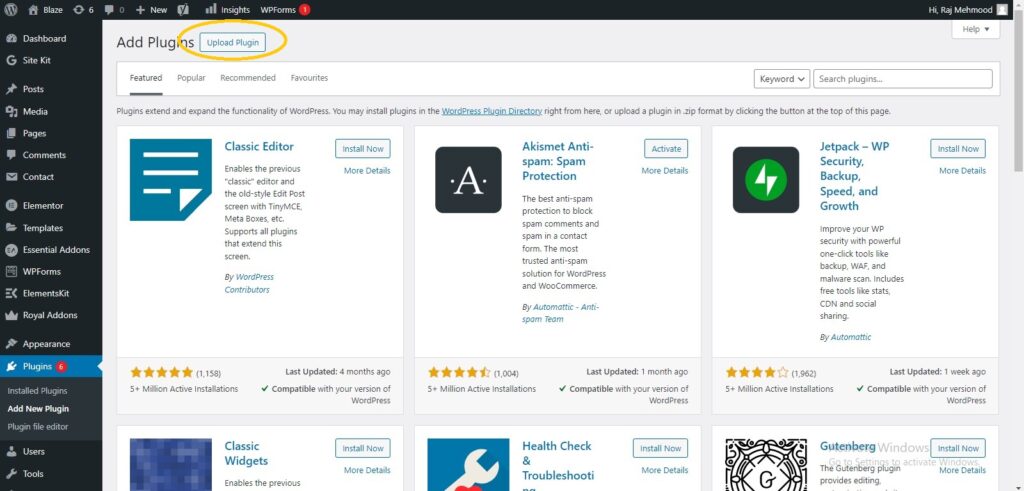
When you click on the upload plugin you’ll get the following page
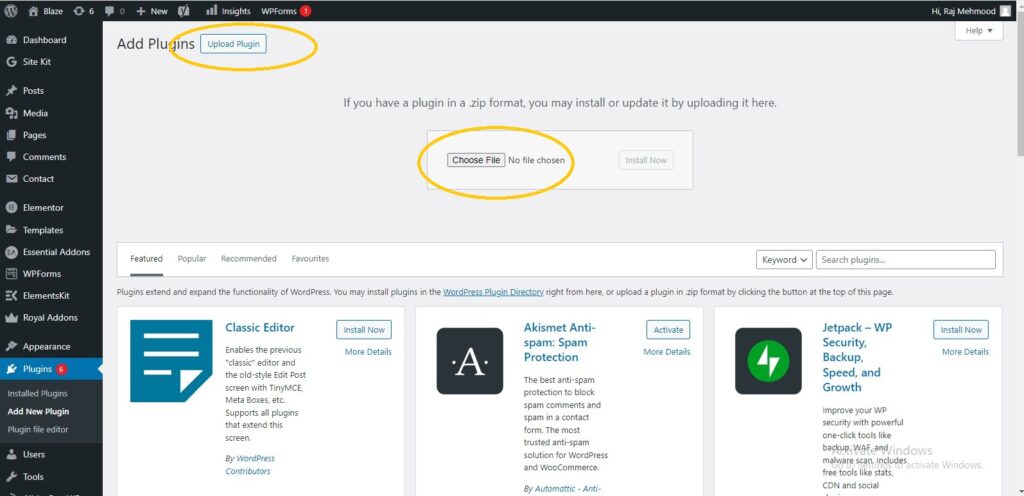
Click on Browse, it goes back to the page where you can select plugins from WordPress site. And if you can click on choose file you can add file from your computer files. Otherwise, you can directly choose the plugin that you need and click on Install Now as seen in the following image
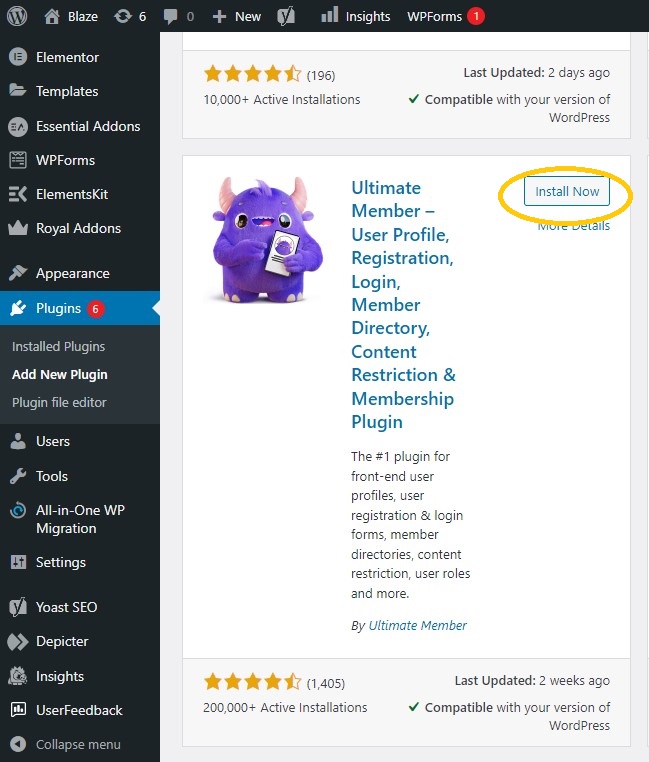
When you click on Install Now, the package starts to download and gets installed. Then, click on Activate Plugin to active that plugin to use in the WordPress site as seen in the following image
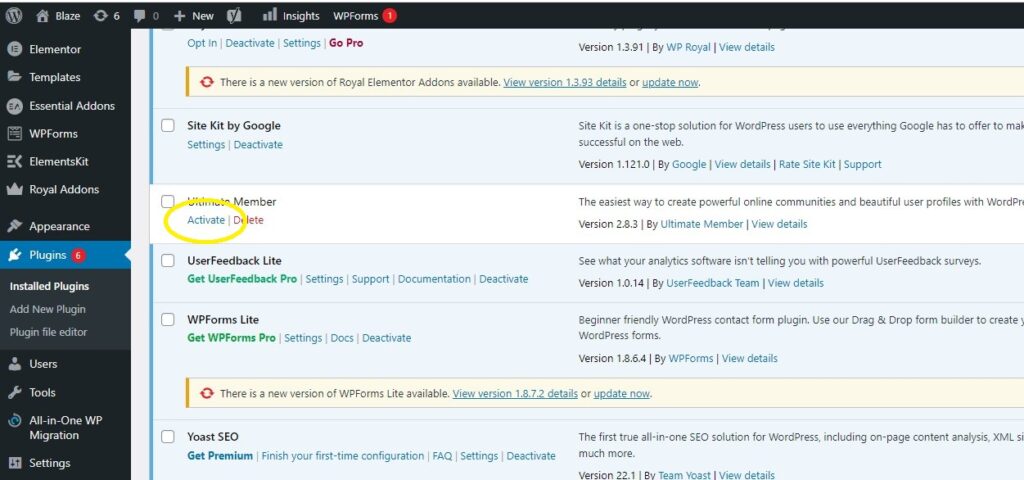
After clicking on Activate Plugin you’ll get a message as plugin activated and you can also find the installed plugin in the list.
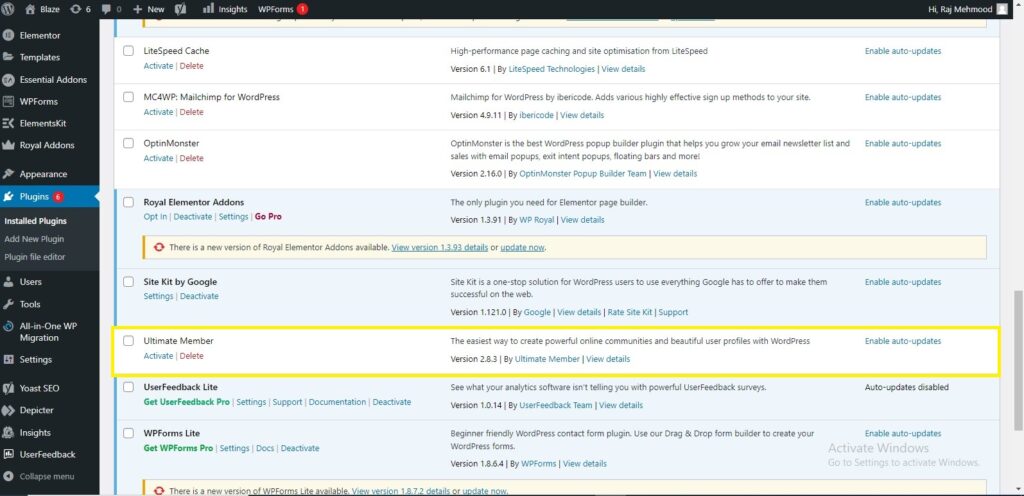
Below the plugin-activated message, you can view a few options such as the All, active, Delete, and Update available options.
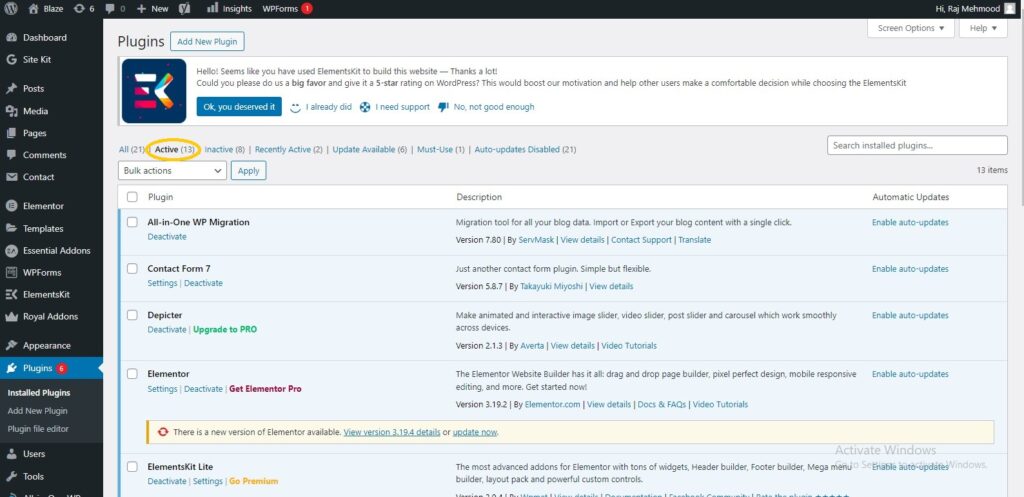
When you click on Active the following page appears. Here you can view all the activated plugins.
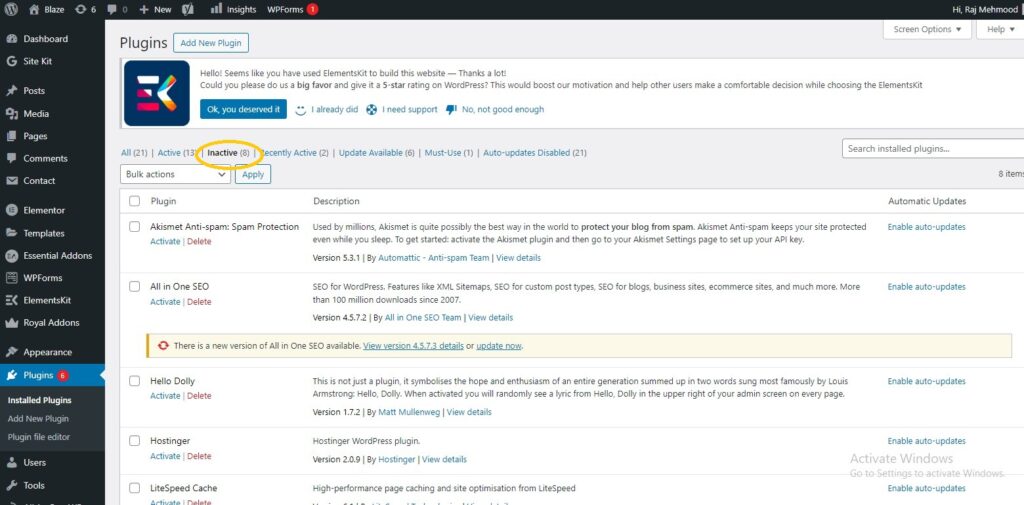
When you click on Inactive, the plugins which are available but are not activated gets displayed. You can activate this plugin by clicking Activate.
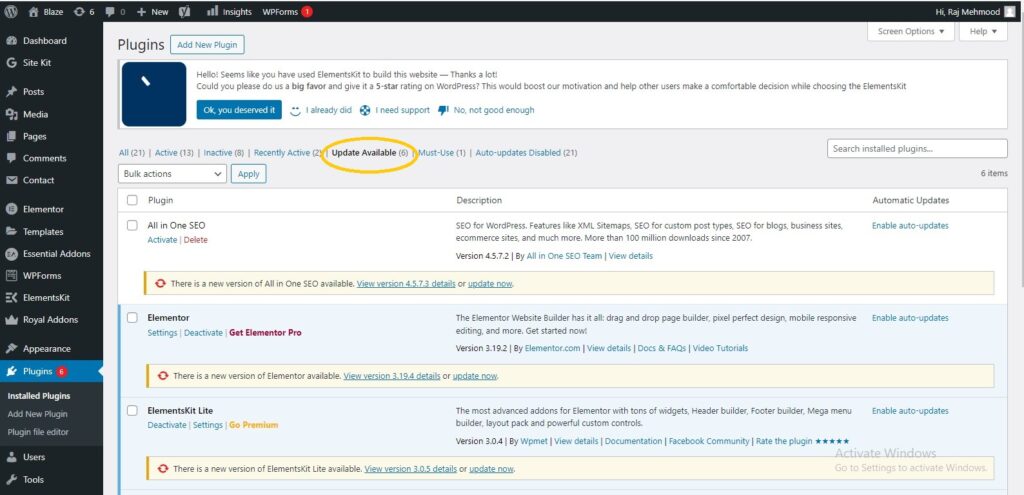
When you click on Update Available, you’ll get a list of plugins that must be updated. Click on Update and you get a message as updated.
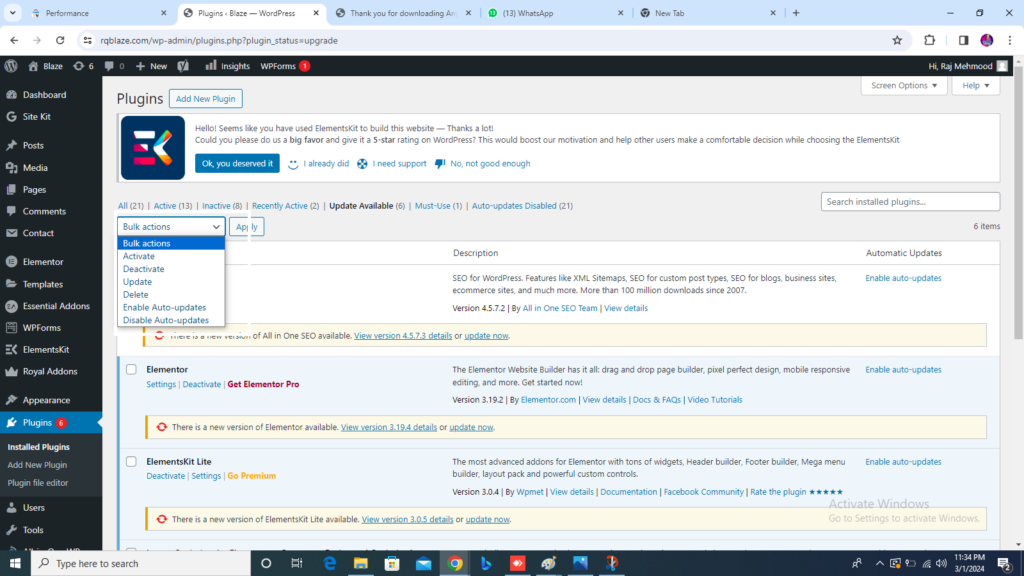
Click on Bulk Actions and select any of the options. Click on the apply button to update, delete, activate or deactivate, enable auto-updates, disable auto-updates each of the plugins by checking the boxes.
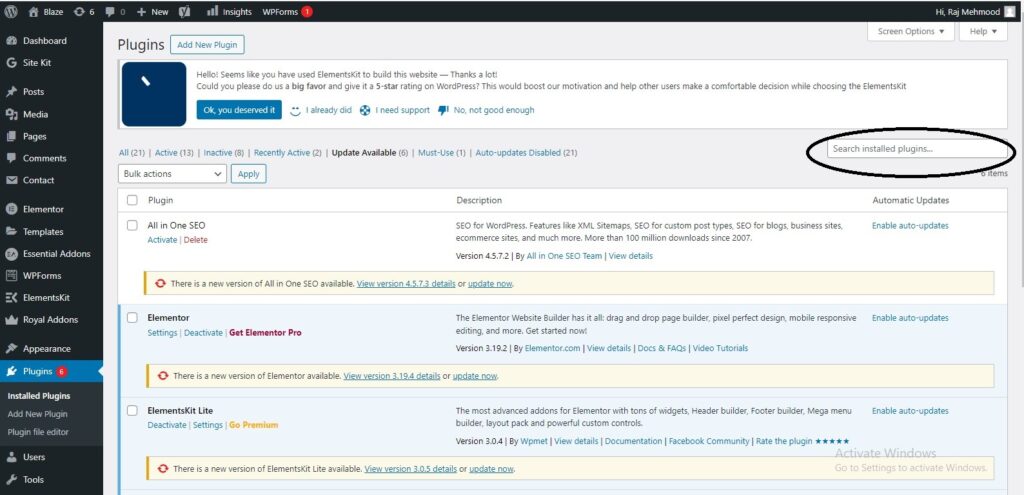
In Search Installed Plugins you can just type your plugin name in the text box that is already installed and click on the search installed plugin button
Step 5: Click on Plugins Editor from the side bar. And the following page gets displayed
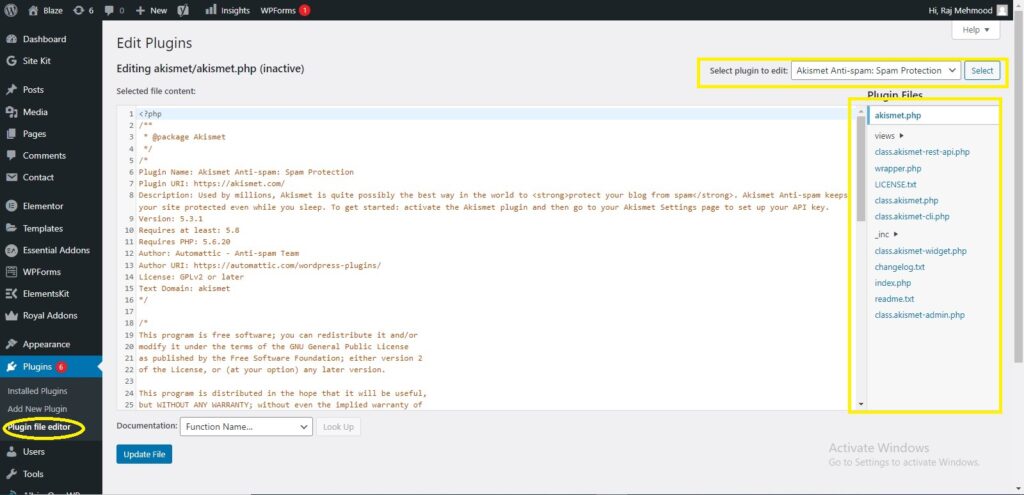
This page lets you edit your plugins. A few options are explained.
- Select Plugin to edit: Allows you to select a plugin from the dropdown and edit it.
- Documentation: Allows you to select the tools from the dropdown to edit the plugin.
- Plugin Files. Allows you to select files from the list and edit accordingly.
Finally, after editing the plugins files, click on Update file.


4 thoughts on “Learn About WordPress Plugins Settings”