In this article, we will see how to add a WhatsApp Chat button on WordPress using the WordPress plugin Click to Chat. Do you want to add WhatsApp Chat to WordPress? WhatsApp is the most popular messaging app in over a hundred countries and is great for allowing Android users and iPhone users to communicate. Using WhatsApp you can send messages, videos, photos, and voice recordings over the internet, which means your mobile plan is not involved. It can work on WordPress as well and it is easy to set up. Add WhatsApp Chat to WordPress There are plenty of situations where you want your visitors or customers to be able to contact you. One of the most important parts of allowing them to do so is how easy it is to do. For starters, WhatsApp is extremely easy to use and fully supports mobile users. All of the communication is browser-based regardless of if it is a mobile user or a desktop user. This means you will not be wasting anyone’s precious data. In fact, any massages, videos or photos sent using WhatsApp will not be saves to the phone. Thus, you will not be taking up any their space, which is ideal for mobile users. How to Install Click to Chat Plugin on WordPress? Click to Chat is a WordPress WhatsApp chat plugin that is easy to set up. It simply adds WhatsApp to your WordPress Website, and you can place it anywhere shortcodes can be placed. If you want to learn how to install plugins on WordPress read this article Now click on Plugins and Then Click on Add New plugin into WordPress Dashboard. Search for Click to Chat in the available search box. This will pull up additional plugins that you may find helpful. Scroll down until you find the Click to Chat plugin click on the “Install Now” button and activate the plugin for use. Click to Chat Settings On the WordPress Dashboard admin panel, Click on Click to Chat and Select the Click to Chat option. Here you will able to set up how WhatsApp works on your website. There are quite a lot of settings to go through. I will highlight the important ones that are required for the plugin to work, but that doesn’t mean you should ignore the others. I strongly recommend going through the settings and seeing what works best for your website. Most of the settings are very straightforward, which is why this plugin is perfect for beginners. Add WhatsApp Number The first thing you need to do is add your WhatsApp phone number. If you do not add this, the plugin will not work. Pre-Filled Text that is Pre-filled WhatsApp Chat window. Add variables {site},{title}, {url} to replace with the site name post title. Current webpage URL and full URL including query parameters. Call to Actions In this section, you want to add initial message, This Can be something as simple as “HELLO” or more specific like “How can we help you”. Style Position In this section, you can change the style of the WhatsApp button, customize it, and change its position. URL Structure In this section, you can do the settings that you want to open the WhatsApp button on your mobile phone or desktop. Display Settings In this section, you can see where you want to show your WhatsApp button that you have created, on a custom page or all pages of your website or specific pages. After doing all the settings according to your preference, you have to click on the simple save change button, after that your WhatsApp button will start working on the app’s website and will be shown. I hope you like this article if you like this informative article please share it with your friends and subscribe to my YouTube Channel. If you want to learn WordPress Video tutorials you can visit my YouTube channel Thanks.
Year: 2024
Are you looking for the best e-commerce themes for creating your online store? You have come to the right place to select the perfect WordPress theme for your online stores. In this article, we’ll explore 8 best e-commerce themes in 2024, each theme offering its unique blend of functionality and style. Flatesome is a popular WordPress theme primarily designed for creating e-commerce websites. While it offers numerous features and benefits, it also has some limitations that users should be aware of: Limitations of using e-commerce theme: Customization Complexity: Users who aren’t familiar with coding might find it challenging to achieve specific design customization. Performance Optimization: While Flatsome is generally well-optimized for performance, extensive customization or the use of many plugins can potentially affect site speed and performance. Dependency on Third-Party Plugins: Flatsome relies on various third-party plugins for certain functionalities, such as sliders, galleries, or advanced customization options. Learning Curve: For new users in WordPress or website development in general, Flatsome might have a steeper learning curve due to its advanced features and customization options. Support and Updates: Users might encounter delays or limitations in getting assistance for issues or queries. Best E-commerce Themes 1:TH Shop Mania TH Shop mania, a popular e-commerce theme, is crafted to establish a polished and attractive online store. It provides a variety of features and customization possibilities to enable businesses to effectively display their products and offer customers a smooth shopping experience with the advantages of 40+ pre-made demo websites. Using the TH Shop mania theme, you can effortlessly launch your online store, handle products, fulfill orders, and tailor the design to align with your brand’s identity. The theme commonly encompasses features like product sliders, intuitive navigation, mobile responsive design, compatibility with major payment gateways, and the ability to support various languages and currencies. Features of TH Shop Mania: Lightweight and Fast-loading Design Extensive Customization Options Seamless Integration with Popular E-commerce Plugins Performance Optimization for speed and efficiency Advantages of using TH Shop mania: Enhanced E-commerce features and customization options Optimization performance for faster loading times. Regular updates and dedicated support. Tailored design elements for professional online store appearance. 2: Top Store Top Store is a chic WooCommerce theme designed for showcasing products elegantly, featuring a modern and minimalist design with responsive mobile responsiveness. It includes an AJAX futuristic header style that can be customized to display contact details, USPs, or promotional messages atop your site. Ideal for electronic stores, home appliances, jewelry stores, food sites, gadget stores, fashion outlets, furniture stores, clothing boutiques, grocery stores, and decorative shops. Features of Top Store: Sleek and modern design Customization layouts Seamless integration with popular e-commerce plugins Responsive design for mobile optimization Advantages of using TH Shop mania: Top Store offers a greater Modern and minimalist design. Top Store provides Responsive Mobile Friendly layouts. It comes with AJAX WooCommerce features. The top store offers a Customization futuristic header style. 3: Open Shop The Open Shop WooCommerce theme is a versatile option for your online store, suitable for a wide array of industries like cosmetics, apparel, fashion, pet shops, jewelry shops, watches, electronics, accessories stores, grocery stores, and multi-purpose stores. Open Shop, a contemporary and unique WordPress WooCommerce theme, is tailored for various store types such as digital stores, hi-tech stores, watch stores, clothing stores, men’s and women’s stores, furniture stores, bookstores, cosmetic ship Features of The Open Shop: Clean and minimalist design Extensive customization options Advanced e-commerce features User-friendly interface for easy navigation Advantages of using TH Shop mania: The open shop offers greater versatility across various industries. Open Shop provides robust SEO optimization features. It offers a modern and unique design. Open Shop offers extensive customization options for your online store. 4: Big Store Big Store is a modern Woocommerce theme crafted to enhance your online store experience with a varity of features. It presents pre-design layouts for e-commerce sectors such as fashion, electronic furniture, groceries, sports, jewelry, and many more stores. Linked with WooCommerce and multiple plugins, it features cart buttons, custom widgets, limitless color schemes, multi-column menu styles, and advanced widgets. The theme is optimized and adjustable, enabling easy customization to suit your needs. Its swift performance improves user experience and is perfect for increasing conversions on your site. Features of Big Store: Bold and eye-catching design Expansive layout options Advanced e-commerce capabilities Support for volume product catalogs Advantages of using TH Shop mania: Divers industry templates for easy setup. Seamless integration with WooCommerce and plugins. Simple customization options for a unique store. Fast performance to enhance user experience and conversations. 5: Divi Divi is a versatile website-building platform that can be a great option for beginners. With several website templates tailored for different businesses, it offers WordPress’s top website builder tools for designing various elements. This makes it easier to customize everything for your site according to your preferences. Features of Divi: Intuitive drag-and-drop builder Extensive library of pre-designed layouts Powerful customization options Seamless integration with third-party plugins Advantages of Using Divi: Divi provides intuitive drag-or-drop options Divi has a vast library of pre-designed layouts Endless customization options Active Community and Support 6: StoreFront StoreFront stands out as the epitome of flexibility and lightweight design in the realm of WordPress e-commerce themes. Crafted collaboratively by a team of dedicated developers at WooCommerce, it’s widely regarded as the quintessential choice for powering e-commerce websites. This theme comes at no cost, making it accessible to all, and its development roots within the WooCommerce ecosystem ensure flawless compatibility with a myriad of WooCommerce extensions. Features of StoreFront: Clean and minimalist design optimized for WooCommerce Seamless WooCommerce integration Flexible customization options Reliable performance for large-scale e-commerce websites Advantages of Using StoreFront: StoreFront offers cost-effective solutions with its free availability Seamless integrating with WooCommerce to support all its featured and extensions Its lightweight design ensures fast-loading pages for an Optimal shopping experience 7: WoodMart Among the top-tier alternatives to my beloved flatsome
Do you want to create a donation Form in WordPress? WordPress plugins allow you to easily accept donations on your website from visitors or some others. That way, your organization can gain consistent funding to help with budget planning and execution long long-term projects. In this article, we will see how to create a donation form in WordPress. Why Need a Donation Form in WordPress? Donations are contributions made by donors regularly to support a non-profit or cause. Instead of a one-time donation, supporters option to set up automatic payments at specific intervals, like weekly, monthly, quarterly, or annually. When running a nonprofit organization, your donors are the heart and soul of your cause. One-time contributions are great, but they might not give you the predictable funding source you need. Donations provide a reliable income to stream so that you can better budget and allocate financial resources. It’s a good way to gamify contributions as well. For example, you could create a membership site using a plugin like MemberPress. The more donors contribute, the better rewards they can earn. You could add a leaderboard, and the tip contributor becomes your VIP guest at events and receives extra recognition or other perks. Now start creating a Donation Form in WordPress: Creating a Donation Form in WordPress with WPForms WPForms is the best WordPress Plugin from a builder with 1500+ templates, including a variety of donation forms. You can also use WPForms to Accept donations. It’s a good method if you need to also create other forms, such as contact forms, opinion forms, multi-page forms user registration forms, surveys, and polls, etc. Connect WPForms to strip To begin, download the WPForms plugin and install it. Upon activation, go ahead and WPForms and then Click on Settings. Then head over to the Payment tab. The default currency is configured to US dollars; however, you can change it to any currency if you’d like. the scroll down and click the Connect with Strip’ button. This allows you to connect WPForms to your Strip account to collect credit card payments. From here, you’ll need to enter your email address or create a new strip account. Make sure to follow the instructions laid out in the Stripe Connect setup wizard to finish the process. After you’ve gone through the process, you’ll be sent back to the WPForms setting page in Your WordPress Dashboard. In the payment tab, you’ll see a green checkmark indicating that the stripe is connected to WPForms. Your strip account is connected, and you’re ready to start building your donation form. Create a Donation Form Go to WPForms and then Click the Add New button. This takes you over the drag-and-drop editor to build your new form. Go ahead and enter a name for your form so that you can keep track of it should have to make edits in the future. Then search and select the Variable Donation Form template. There are other donation form templates you can also use, so you might want to experiment with them to see which is right for you. Click on the Use Template; Now, you can customize the form and add any additional fields that make sense for your donations page. You can edit any existing field by clicking on the element and then making the changes under the “Field Options” tab. Since you’re automatically charging donors’ credit cards, you probably want to make it crystal clear that you’ll be taking donation payments. You can also go to the Add Fields tab to add any additional fields that aren’t already in the donation form template. Enable Donation Payments Next step, head over the Payment and then click on the Strip tab. Then, turn on the option to Enable recurring subscription payments. Once activated, you’ll have more options appear. You’ll be able to edit the plan Name, which is a title that appears in your stripe transactions. Also, you can edit the Recurring Period. This is how often the credit card will be charged for recurring donations. In the drop-down menu, select the periods available, such as daily weekly monthly quarterly, semi-annually, or annually. Once that is done, all you have to do is add the form to any WordPress page. Click the Save button at the top to save all the changes you’ve made. Then click on the embed button. Assuming you already have a donations page, you can choose “Select Existing Page” and pick the page you want to add the form to. But if you don’t have one, click on the “Create New Page” button. Now that you’re on the page, click on the plus icon. Then add the WPForms block to the page. From here, select the donation form you’ve just created with WPForms. Then click on the Publish button. Lastly, go ahead and preview the page to make sure that everything looks good. Also, check that you can accept your strip account. On the WPForms payments page, you’ll be able to see all of the total payments, sales, and subscriptions you’ve received. That way, you can track the performance of your donation form. I hope this article helped you learn how to create a donation form in WordPress. If you liked this article, then please subscribe to my YouTube channel for the WordPress Video Tutorial. If want to create a Donation form in some way then this article is just for you. How to create a donation Form in WordPress
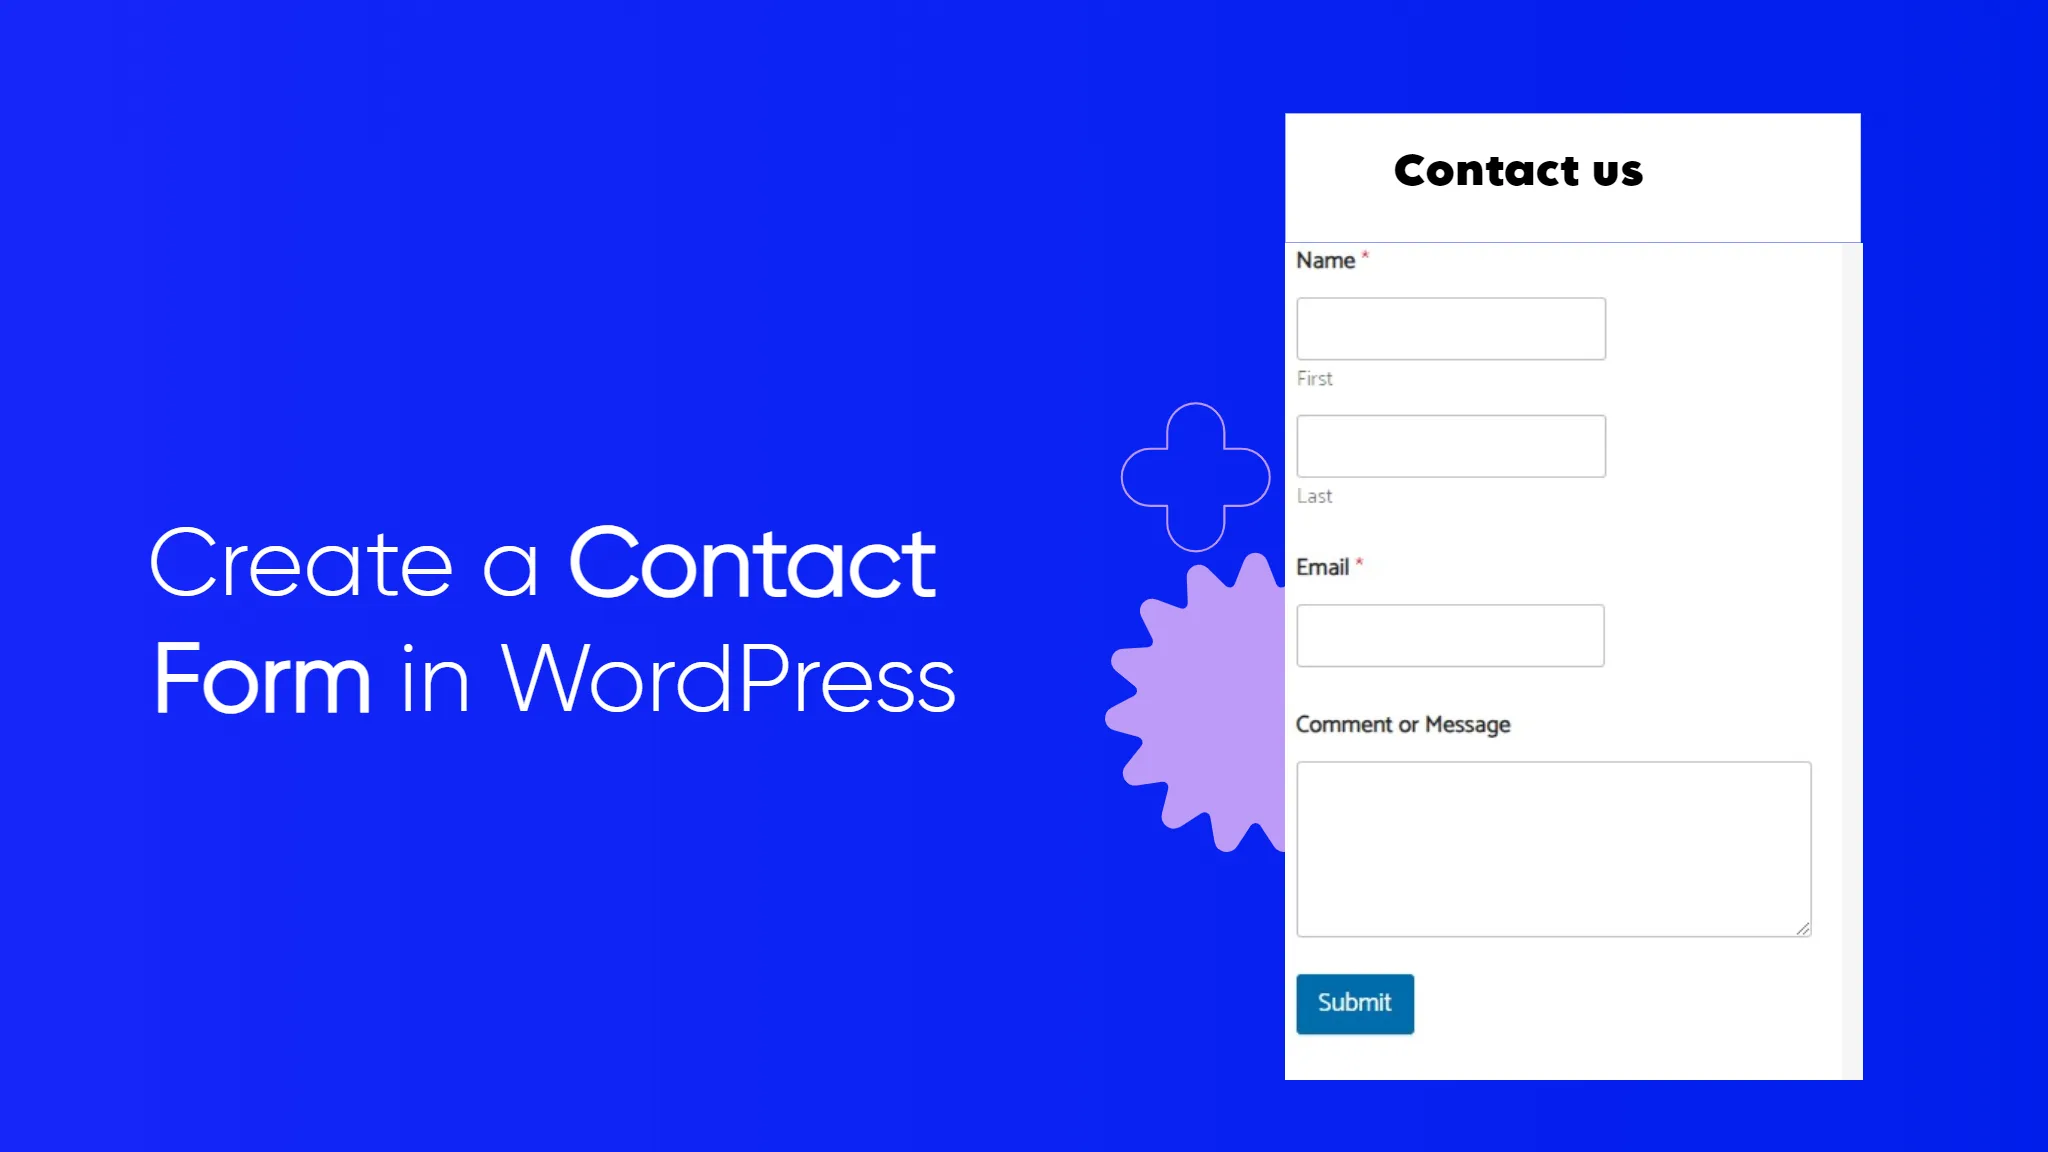
How to Create a Contact Form in WordPress In this Blog, we will see how to create a contact form on a WordPress website. Every website needs a contact form, so visitors can easily contact you about your products and services. By default, WordPress does not come with a built-in contact form, but there is an easy way to add contact forms to your site. Are you ready to learn how to create a Contact form on a WordPress Website without touching a single line of code? put image Why is a Contact Form needed You might be wondering why is a contact form needed. Can’t I just add my email address on my website, so people can email me? That’s a very common question for beginners because they are afraid that adding a contact form requires coding knowledge. But Now a time, you can use a WordPress plugin to simply add a contact form to your WordPress website with zero coding knowledge. Here are the 3 reasons why a contact form is better than pasting your email address on a page. Spam Protection: Spam bots regularly scrape websites for the mailto: email address on the website, you will start to receive a lot of spam emails. On the other hand, your contact form can block the contact form span and stop almost all spam emails. Consistent Information: When emailing, people don’t always send you all the information that you need. With a contact form, you can tell the user exactly what information you’re looking for, like their phone number, budget, project details, and more. Saves Time: Contact forms help you save time in more ways than you can imagine. Aside from consistent information, you can also use form confirmations to tell the user the next steps they should take. Like, watch a video or wait up to 24 hours to get a response, so they don’t send you multiple inquiries. Let’s show you how to create a contact form on a WordPress Website, step by step. Choosing the Best WordPress Contact Form Plugin The first thing you need to do is choose the best WordPress Contact from Plugin. There are several paid and free WordPress Contact Plugins you can choose from, we use WPForms on our WordPress website and believe it’s the best option in the market. Why WPForms Better than Other Plugins? It is the most beginner-friendly contact form plugin available. You can use the drag-and-drop builder to easily create a contact form in just a few clicks. WPForms Lite is 100% free, and you can use it to create a simple contact form over 6 million sites use it. When you are ready for more powerful features, then can upgrade to WPForms Pro Install a Contact Form Plugin on WordPress You can install this plugin on your site by logging into your WordPress dashboard going to Plugins and then clicking Add New This will automatically install the plugin on your site. Next, you do need to activate the plugin by clicking the Activate Button If you don’t see the plugin menu or want more detailed instructions, then see our step-by-step guide on how to install a WordPress plugin How to Create a Contact Form In WordPress Now that you have activated WPForms, you are ready to create a contact form in WordPress. To do this, navigate to WPForms and then click on All Forms in your WordPress admin panel. Then, click the Add New button. This will open the WpForms drag-and-drop form builder template library. Start by giving your contact form a name and then select your contact form template To choose a template simply hover over it and click the ‘Use Template’ button. WPForms Lite comes with over 20+ free-form templates to choose from. You can use these to create just about any type of contact form you like. For the sake of this example, we will go ahead and select the ‘Simple Contact Form’ template. It will automatically add the Name, Email, and Message fields. click on any of the form fields to edit them. When you click on a form field it will bring up a ‘Field Options’ panel on the left where you can make changes. Use your mouse to drag and drop the fields to change the order If you want to add a new field, then simply select from the available fields on the left sidebar. You can drag it over to your form or click on it and it will automatically be added to your form. When you’re done customizing your form make sure to click the Save button to save the Contact form. Configuring WordPress Form Notification and Confirmation Now that you have created your contact form, it’s important that you properly configure the form notification and form confirmation options. Form confirmation is what your website visitor sees after they submit the form. This can be a simple thank you message, a page where you’ve uploaded downloadable PDFs or anything you’d like. Form notification is the email you get after someone submits the contact form on your WordPress blog. To customize the confirmation message, click on the ‘Settings’ tab and then the ‘Confirmations’ tab inside the form builder. There’s already a default thank you message. However, you can customize this in the ‘Confirmation Message’ box, if you’d like. If you want to redirect users after successful form submission instead of showing a message, then select ‘Go to URL’ from the ‘Confirmation Type’ dropdown. Then, enter the URL where you want to redirect users too. If you have made any changes here, then make sure to click the ‘Save’ button. After that, you can make sure the form notification settings are correct. Simply click on the ‘Notifications’ tab from the same ‘Settings’ menu. The best part about WPForms is that the default settings are ideal for beginners. When you go to the notification settings, all fields will be pre-filled dynamically. The default notification will sent to the admin email that you provided
How to Optimize your WordPress Site In this blog, we will learn how to Optimize a WordPress site in 2024 with some easy steps. Here are a few simple tips to optimize your WordPress Site. Ensure high-quality and meaningful content. Have the right name for images. User short permalinks that contain keywords. Have optimized themes. Sitemap should be in XML form. Content posts to social networks Beware of black hat techniques. Detete Your trash box for the best speed. Keep checking your Site Statistics. Keep checking your plugins. Use CSS and JavaScript effectively. Update everything. Optimize images. Delete unused plugins. Install high-quality plugins only Install a WordPress caching plugin. Simplify your page design and content. Limit or disable post revisions. Choose a reliable hosting provider. Ensure High Quality and Meaningful Content For any page you create, the important thing that matters is the content. You must have good content with keywords that can be helpful for users, not for users not for search engines. Content should be understandable and not complicated to read. Have the right names for images The name you choose for your images must be unique; consider choosing images keeping the user in mind. Use keywords that might be helpful for the users. Have some specific names for your images and don’t forget to add your alt tags and title tags to your images. For Example: If your image is about Dental Cream Medicam do not mention the name as DSC12356. instead put it as “Dental-cream-medicam-advance-formula-with-fluoride.jpg”. This would be much easier to search. Use short permalinks that contain keywords The permalinks you use must be understandable. For Example: Use (https://mywebsite.com/rqblaze/wordpress-tutorials/ instead of https://www.mywebsite.com/page-id?24564752278). Have Optimized themes Use those themes that are fast and are optimized for WordPress so that when applied to a website, it must not have low speed. Sitemap should be in XML format Google has many tools that can be useful. Tools like Website Optimizer, Webmaster Central, and Google XML sitemaps are very easy to use. Contact Posts to Social Media Social Media is a very important aspect today. So have them contact your blog posts, pages, etc, to have good ranks and popularity. Help promote others’ posts and pages too and they will do the same in return. Beware of black hat techniques Don’t trick Google as it finds you in time. Don’t put yourself in trouble and create problems for your site by using black hat techniques. Be sure to use genuine SEO techniques. Delete your trash box Always consider clearing your trash for more speed and to have a good flow with your website. Keep checking your site statistics The size of the page matters a lot. The more images, videos, flash, or media-related posts on your page, the more it will be slower to load. Yslowi>module plugin is recommended to help you get faster page browsing. Check Plugins Having many plugins in WordPress may also be the reason for your page to slow load. So keep a check on the plugins that you’re working on. Consider checking your plugins before you add them. Use CSS and JavaScript effectively Always keep your CSS at the Upper side of the page and Javascript at the bottom. Let CSS load first and then JavaScript. Here is a plugin that will help you get your JavaScript at the bottom of the page. Update everything WordPress core, themes, and plugins all need to be updated to help your site run as efficiently as possible, among other things. Always be running the latest versions to optimize performance, keep your site secure, patch bugs, and ensure every feature and tool functions as it should. Optimize images Large images are another common culprit of slow WordPress websites. To further raise your site performance, reduce your image file size as much as possible without sacrificing quality. The goal is to save space but avoid making users quint to see your visuals. You can compress image files with Photoshop or any other image editing software. You can also try a WordPress image Optimization plugin like Smush or EWWW Image Optimizer Delete unused plugins Quality is better than quantity when it comes to WordPress plugins. Since each plugin is like a place of mini software on your website, too many running at once can negatively affect your site’s load time. Even if you’re not using a certain plugin, there’s a chance it’s doing unnecessary work in the background and consuming resources. It might be time to cut back. Start deactivating any plugins you’re certain you’ll never use again. Test your site after each deactivation, then delete these plugins after verifying that everything still works. Then deactivate the plugins one by one to see which one makes a difference in speed. Consider finding lightweight alternatives to these plugins. Install high-quality plugins Now that you’ve taken care of the quantity part by cutting loose your unneeded plugins, make sure the plugins you do keep around are high quality. The WordPress plugins are coded in such a way that only consume the server resources they need when they need them. These plugins are also light on code won’t occupy too much storage space on your server, and are updated regularly to keep up with WordPress core updates. Install a WordPress caching plugin Every time a visitor requests a web page from a non-cached site, the PHP on your WordPress server has to retrieve all the relevant content from your WordPress database, assemble it into an HTML file, and send that file to the client. This method has its advantages, including saving server space and allowing for dynamic website content. But, it also takes more time and energy than sending a pre-written web page. A caching plugin simplifies this entire process. It builds every HTML page on your site with PHP, then saves these full HTML pages which are sent to future visitors when requested. By skipping over the building process, your content reaches visitors more quickly. As far as options go, we recommend
How to install Theme In WordPress Now will see how to install the theme in WordPress. Themes help you to give a new look to your website. Here we have installed a new theme on WordPress. Following are the steps for installing a theme in WordPress. Click on Appearance and then click the themes. All themes will appear as already downloaded now you click on Add New Theme Here you can search for themes that suit your needs. If you have already downloaded theme in Computer storage you can Upload the file by clicking on upload theme button Now click on Add New Theme The following screen will appear. The theme page is shown in from of you from here you can install this theme. Some options are given here Populor theme, Latest theme, Block theme, and favorite theme, if you want to search for any of these themes, you can also search for them from the search bar. If you have already a theme then you can upload and install that theme by clicking on the Upload theme button All you have to do is mouse over the theme you want to install theme in WordPress. There you will see some options showing details and preview and below two options install and preview then have to click on the simply install button. After clicking there, your theme will be installed. After that you have to Activate it, after activation, your theme will go live. Theme Management In this blog, we will study Theme Management. It includes image files, templates, CSS stylesheets, etc. that can help to make your website look great. This blog discusses how to install themes, add new themes, or customize themes in WordPress. Following are the steps for Theme Management. Select Appearance and then click on Themes from the dashboard. The following screen will be displayed. Hover over any theme and click on Themes. When you click on Themes Details the following page appears. It consists of details related to the theme. Details like version, description, tags, etc. If you want to add this theme to your page /website then click on Activate, and if you want to just check the theme, then click on Live Preview. If you click on activate then you get a pop-up message: “New theme activated. Visit site” Now click on the customize button. On the left side of the page, you can customize your theme. Any changes you make or anything new you add to displayed on the right side of the page. How to Customize Theme in WordPress Now we will see how to customize themes. Customizing a theme helps you to give a new look to your website. Here you can change the background image/color, add titles, and much more. Following are the steps of Customize theme. The following screen will be displayed. As can be seen, on the left side we have the customizing section, and on the right side, we have the theme you have chosen. So any changes you make on the left side will be displayed on the right side of the page. Here are a few options you must know: Activate Theme: In this section, you can change the current theme just by clicking on “Change”. When You click on “Change” you get a list of themes, click on any of the themes, and then click “Save & continue”. Your theme will be saved. Site Title & Tagline: In this section, you can add the site title and tagline you want to add to your website. Add your title name in the Site Title section. And your tagline in the Tagline box. Color: You can change your header text color using this section. As you scroll through the colors you find changes happening on the right side of your page. You can even add a color of your own into the box that is situated in between the “current” color, and Default”. Header Image: Add a header image either by selecting from the suggestions or you can add an image of your own by clicking on “Add New Image”. Widgets: Add widgets to your site by clicking on the widgets button. Here, there are two options, first is the “main widgets area” when you click on this you get another list of widgets that are to be displayed in the footer area. When you click on any of the widgets a dropdown appears where you can edit more or add more. You can add your category in the “Title” section. Check any of the required boxes. If you do not want to add any, then say “Remove”. The same goes for other widgets too. Secondary Widget: Here you must click on Add a Widget and you get a sidebar with a list of different widgets. Click on any and it adds up your widgets lists. if you want to add more widgets then click on Add a widget again and you can add as many widgets as you want. Homepage Setting: Select either the latest posts or the static front page for your site. Social Links: Through social links, you can add links to social websites in the header section of your website. Additional CSS: You can add additional CSS stylesheets to your website to change its layout and design. Sharing is Caring!
WordPress User Roll In this blog, we will study the roles of Users in WordPress. Every user has a role in WordPress. Roles are like permissions given to a particular user to access the WordPress site. These roles can be allotted only by the Admin. Here are a few pre-defined roles available in WordPress: Administrator: The Administrator has all the rights. An Admin can do anything and everything on the WordPress site such as creating more admins, inviting more users, and also removing them. Author: The Author can only write posts, upload pictures, edit, and publish their posts. Editor: The Editor has access to all the posts, pages, comments, categories, tags, and links. They can create, publish, edit, or delete any posts or pages. Contributor: The contributor can only write and edit their posts until published. They can create their posts and pages but cannot publish them. They cannot upload images or files but can see your site’s status. When they want to publish any post, it must be first notified personally to the administrator for view. When the post is approved, the contributor cannot make any changes once published. Follower: The Follower can only read and comment on the posts. Followers have signed in to your account to receive updates. Viewer: Viewers can only view your posts; they cannot edit but can only comment on the posts. Add New User we will see how to Add Users to your WordPress blog or website. When users register on your WordPress blog or website, you get an email notification, so you always know when new users register, and you can then get into your Dashboard and edit the Users’ role. Following are the simple steps to Add Users in WordPress. Click on User and then click Add New in WordPress. You can fill the user detail on the Add New User page. Fill in all the required fields as seen in the following screen to proceed further. Username *: Enter the unique username, that you want to display on the website. Email *: Enter the valid email address. The user receives notifications from the site at this email address. First Name: Enter the user’s first name. Last Name: Enter the user’s last name. Website: Enter the URL for the user’s website. Password*: Enter the password. Repeat Password*: Repeat the same password as the previous password for authentication. Send Password: Send password to the new User by email checkbox. The User will receive an email with the new password. Role: Select the particular role from the dropdown, i.e., Subscriber Contributor, Author, Editor, or Administrator. Click on the Add New User button to add users to your users list. Now, you can view the user list to see whether the users have been added. A message will be displayed as New User Created as seen in the following screenshot. User Photo Now we will learn about User Photo in WordPress. To add user photo in WordPress, you must install plugin User Photo from WordPress plugins. It helps you add a photo of your own to your WordPress profile. Following are some simple steps to add a User Photo. Click on Settings and then click User Photo. The User Photo Options page gets displayed. Set the dimension for your thumbnails make the required changes and then click on the Update Options button. To view the plugin User Photo is activated, go to User and then Your Profile. On your profile page you can see Your Photo section is added. Here you can upload your photo to display as a profile image. Edit User If you want to edit users follow these simple steps to Edit Users in WordPress. Click on Users and then Click All Users. You will see a list of all Users. There are two more tabs seen on the toolbar. Administrator: A list of administrators will be displayed. Subscriber: A list of Subscribers will be displayed. When we click on the changing role to box, a dropdown list appears as seen in the preceding screenshot. Subscriber: A person who can only manage his profile. Contributor: A person who can write and supervise own posts, but cannot publish them. Author: A person who can publish and manage his posts. Editor: A Person who can publish and manage posts, including the posts of other users. Administrator: A Person who has access to all the administration features within a single website. Click on the check box of the user name to change the role of the user. Then, click on the change button and the user’s role will be changed accordingly. Click on the Edit option as shown in the following screen to edit the user. The Edit User page is displayed. Here you can edit or modify all the fields as per your need and click on Update User to save the changes. Delete User How to delete User in WordPress. Following are the steps to Delete Users. Click on Users and then Click All Users. A list of Users is displayed a shown in the following screenshot Select the one you want to delete. Click on Delete. When you click on Delete you get the following page. Select options as required and click on Confirm Deletion. Your user will be deleted. We have another method of deleting users. A screen as shown in the following shot appears. Here you can select the user to delete, check the boxes click on delete from the dropdown list, and click on Apply. Once You click on Apply, the users selected will be deleted. Personal Profile Now we will see how to create a Personal Profile in WordPress. Following are the steps to a Personal Profile. Click on Users and then click on Your profile from the left navigation. When you click on “Your profile” the following screen will be shown. The following Personal Options appear on the screen. Visual Editor: While you are adding posts/pages to your site you can enable this setting if
What is WordPress Plugins? A WordPress Plugin is software that helps WordPress users create powerful and functional websites without writing a single code. With WordPress plugin, you can enhance the functionality of your website. View Installed Plugins we will see how to View Installed Plugins in WordPress. It helps you to enable and disable WordPress plugins. This adds unique features to an existing website. Plugins extend and enlarge the functionality of WordPress. Click on Plugin and then click Installed Plugins in WordPress. Now, you will see the list of existing plugins on your site as seen in the following screenshot. A table of Plugin and Description is displayed. Names of the plugins are defined in the plugin column and a brief description of the plugin is defined under the Description column. Toolbar The following functions appear as plugin toolbar options on the page. Active: Shows the active plugins on the website. Inactive: Shows the installed but inactive plugins on the website. Update Available: Shows, if a new version is available or asks to update. How to Install Plugins in WordPress? In this blog, we will learn how to install plugins in WordPress. It is really easy to install plugins. All the plugins are free to download the only condition is that a plugin must be in the WordPress directory. Following are some simple steps to install plugins in WordPress. Click on Plugins and mouse hover Add new in WordPress Here you can enter your required plugin name in the search box as shown in the following image. A list of plugin that are relevant to the plugin name will be displayed as seen in the following image: Select the required plugin you want to use. Here, we have searched (All in one SEO pack) plugin, which happens to be the first plugin as in the preceding screen. Click on the Install Now button to install the plugin on your website. Now, The Plugins automatically start downloading and installing. Click on Activate Plugin to activate the plugin on your website, which makes your task much easier using this plugin. Once Activated, you will see the installed plugin in the list of plugins as seen in the following screen. Customize Plugins in WordPress Now we will see how to customize Plugins in WordPress without writing any HTML or CSS. It’s usually a large addition for multi-site user sites. This new method allows you to customize your login page by using the WordPress Theme Customize (no coding skills required). Follow these simple steps to Customize plugins in WordPress. Click on Plugins and click the Add New button. Install and activate the Custom Login Page Customize plugin. Click on Appearance and then Click Login Customize sections Click on the Start Customizing button to proceed further. It will launch the built-in WordPress theme customizer. You can customize the theme and make it look the way you want. Click on the New Login Customizer tab in the side panel. The Login Customizer page will be displayed. On the login customizer page, you can customize your login page in the same way as you customize your WordPress theme. The Customized login page will appear as shown in the following screenshot. Logo: Upload a logo of your choice to replace the default WordPress logo. Background: Add a background image or you can choose a background color of your choice. Form Background: Select the form background image or color for login from a container of your choice. Most of the selections in the Customizer panel are transparent. You can check all the selections in the customizer to adjust the settings as per your requirement for your login page. Click on the Save and Publish button Sharing is Caring!
How to Add Links in Page and Post In this blog, we will learn how to Add Links to WordPress pages. A link is a connection from one resource to another. Adding links to pages or blog posts helps you to connect to other pages. Following are some simple steps to Add Links in WordPress. Click on Pages and mouse hover All Pages. in WordPress. A list of pages created in WordPress will be displayed as shown in the following image. Select any of the pages to add links inside it. Here, we are going to add links to the Privacy Policy page. Select the word where you want to add a link and the above window will show from there you have to click on the link option. A pop window will show below in which you have to write the link, then click on the arrow icon and your link will be displayed. If you want to set it you have to select the word again, and a pop window will show, you have to click on the edit icon there. Text: Insert text you want to enter into a link. Link: Enter the URL you want to link. Open Link in a New tab: Open your link page into the new tab. Check the box as required. Mark As Nofollow: The nofollow tag tells search engines to ignore that link. Because nofollow links do not pass PageRank they likely don’t impact search engine rankings. Check the box as required. When you click on the Media then the link tooltip gets displayed as in the following screen. Now click on the Update button to update the changes on your page. How to Delete Link from your page or post Select the word that you had already linked. i,e Media, and click on the Remove Link Symbol as seen in the following screenshot. When you select the word Media, there will be no tooltip of the existing URL. The following screenshot shows that the link has been deleted. Sharing is Caring!
How to create tags in WordPress In this blog, we will study how to add tags to a WordPress Site. Tags a small information attached to the main content or post for identification. It tells the visitors what the post is about. If the tag is mentioned properly then it helps to find the content very easily. Following are the simple steps to Add Tags in WordPress Click on Posts and then Tags in WordPress The Tags page is displayed Following are the details of the fields on Tags. Name: Enter the name of the tags Slug: A word chosen to describe your post. It is specified in the tags URL. Description: Add a brief description of your tag. It gets displayed when you hover on the stage. After filling in all the information about tags, click on the Add New Tag button. Now the newly created tags will be displayed on the right side of the page as shown in the following image How to Edit Tags in WordPress In this section, we will learn how to edit tags created in the previous section. Following are some simple steps to Edit Tags in WordPress. Click on Posts and then click on tags in WordPress Now you can view the tag (WordPress ) created in the previous section. When the cursor hovers over the tags, then a few options are displayed below the tag name. There are two ways to edit the tag Edit and Quick Edit. Edit: click on the Edit option in the tags section as shown in the following image You can edit any of the required fields, and then click on Update button as shown in the following image. Here tag fields are different from the Previous section Add Tags. Quick Edit: Click on the Quick Edit option in the Tags section as shown in the following image Here you can only edit the Name and Slug of the tags as seen in the following image and then click on Update Tag button How to Delete Tags in WordPress In this section will see how to delete tags in WordPress. Following are some steps to delete tags in WordPress. You can delete the tag (WordPress) created in the Previous section Add Tags. When the cursor hovers over the tags, then few options are displayed below the tag name. Click on Delete in the tags section as shown in the following image When you click on delete, you will get a pop message asking for confirmation to delete. You can click the ok button and delete the tag permanently. Sharing is Caring!

