

How to install Theme In WordPress
Now will see how to install the theme in WordPress. Themes help you to give a new look to your website. Here we have installed a new theme on WordPress.
Following are the steps for installing a theme in WordPress.
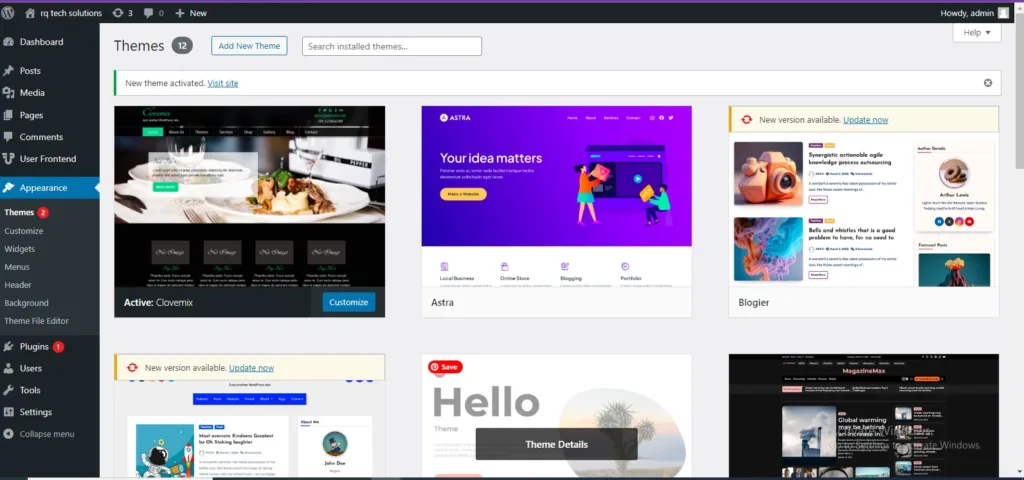
Click on Appearance and then click the themes.

All themes will appear as already downloaded now you click on Add New Theme Here you can search for themes that suit your needs. If you have already downloaded theme in Computer storage you can Upload the file by clicking on upload theme button
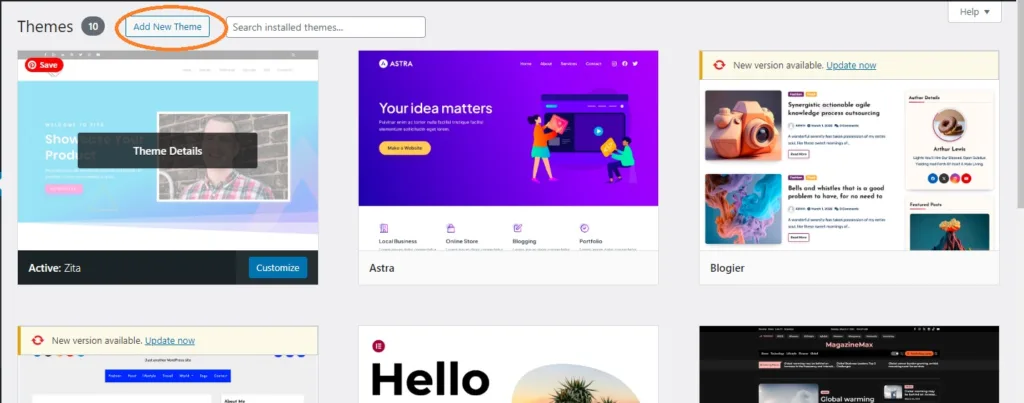
Now click on Add New Theme The following screen will appear.
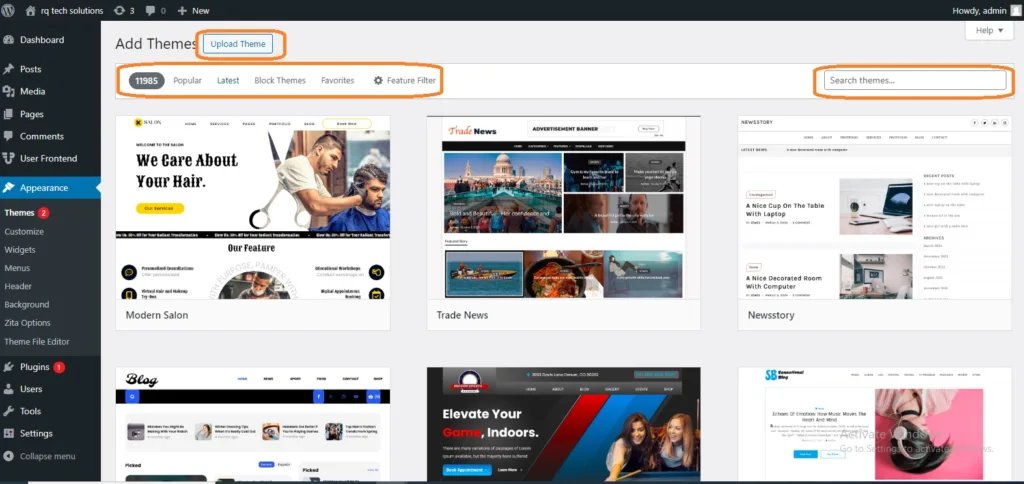
The theme page is shown in from of you from here you can install this theme. Some options are given here Populor theme, Latest theme, Block theme, and favorite theme, if you want to search for any of these themes, you can also search for them from the search bar. If you have already a theme then you can upload and install that theme by clicking on the Upload theme button
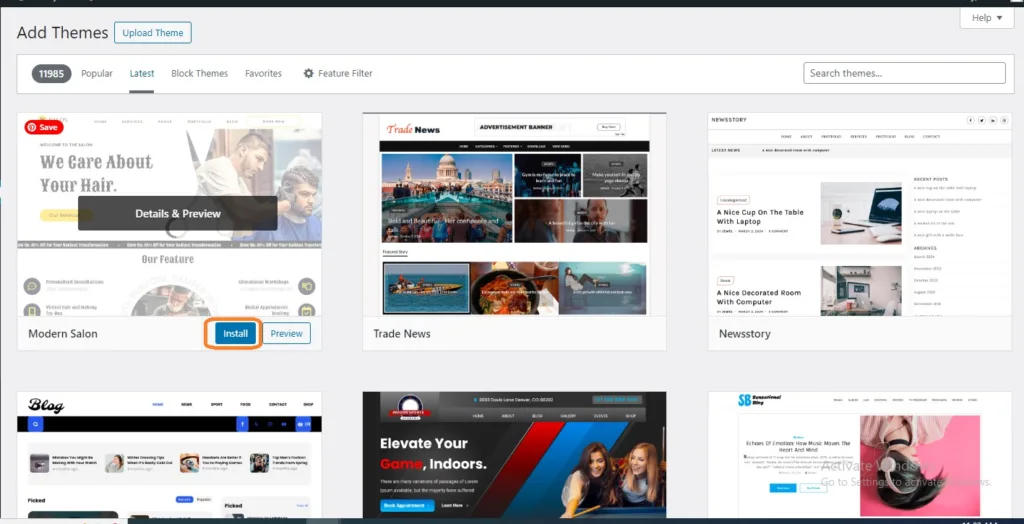
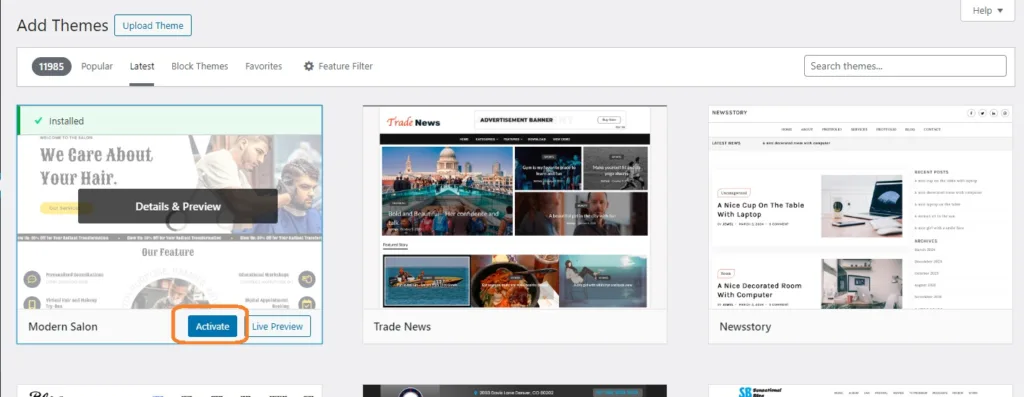
All you have to do is mouse over the theme you want to install theme in WordPress. There you will see some options showing details and preview and below two options install and preview then have to click on the simply install button. After clicking there, your theme will be installed. After that you have to Activate it, after activation, your theme will go live.
Theme Management
In this blog, we will study Theme Management. It includes image files, templates, CSS stylesheets, etc. that can help to make your website look great. This blog discusses how to install themes, add new themes, or customize themes in WordPress.
Following are the steps for Theme Management.
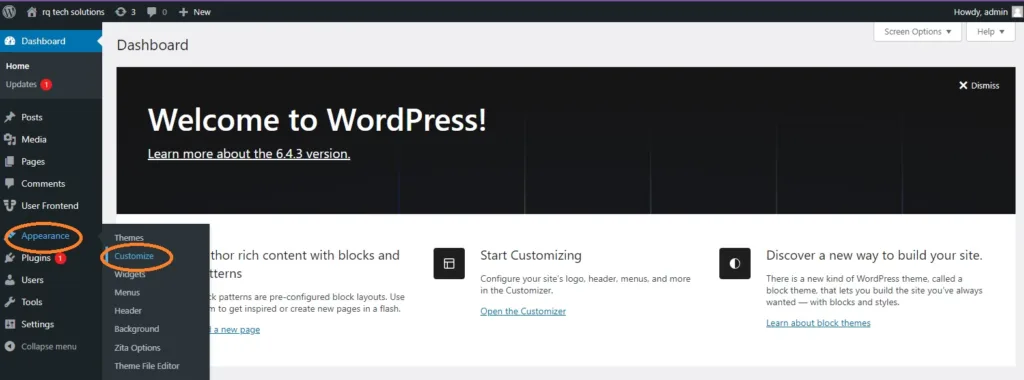
Select Appearance and then click on Themes from the dashboard.
The following screen will be displayed. Hover over any theme and click on Themes.
When you click on Themes Details the following page appears. It consists of details related to the theme. Details like version, description, tags, etc.

If you want to add this theme to your page /website then click on Activate, and if you want to just check the theme, then click on Live Preview.
If you click on activate then you get a pop-up message:
“New theme activated. Visit site”
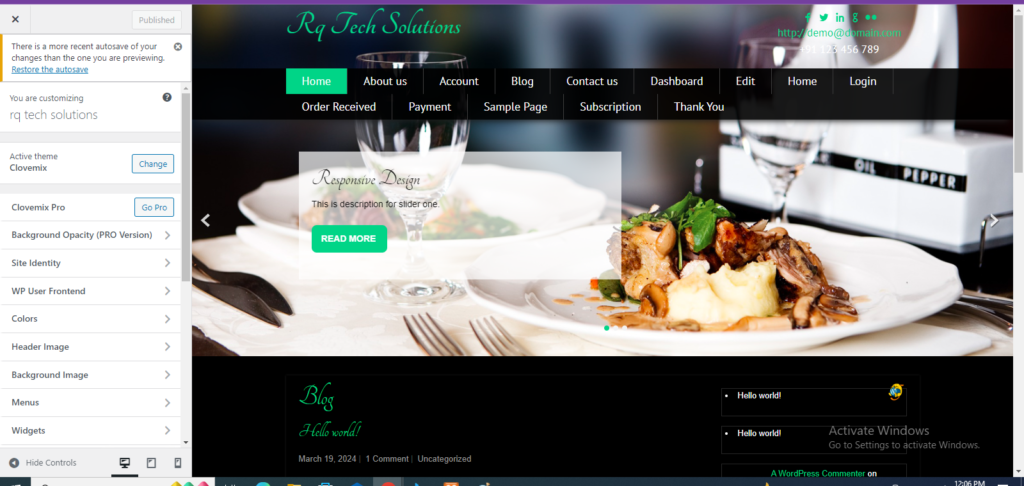
Now click on the customize button.
On the left side of the page, you can customize your theme. Any changes you make or anything new you add to displayed on the right side of the page.
How to Customize Theme in WordPress
Now we will see how to customize themes. Customizing a theme helps you to give a new look to your website. Here you can change the background image/color, add titles, and much more.
Following are the steps of Customize theme.
The following screen will be displayed.
As can be seen, on the left side we have the customizing section, and on the right side, we have the theme you have chosen. So any changes you make on the left side will be displayed on the right side of the page. Here are a few options you must know:
Activate Theme:
In this section, you can change the current theme just by clicking on “Change”.
When You click on “Change” you get a list of themes, click on any of the themes, and then click “Save & continue”. Your theme will be saved.
Site Title & Tagline:
In this section, you can add the site title and tagline you want to add to your website. Add your title name in the Site Title section. And your tagline in the Tagline box.
Color:
You can change your header text color using this section. As you scroll through the colors you find changes happening on the right side of your page. You can even add a color of your own into the box that is situated in between the “current” color, and Default”.
Header Image:
Add a header image either by selecting from the suggestions or you can add an image of your own by clicking on “Add New Image”.
Widgets:
Add widgets to your site by clicking on the widgets button. Here, there are two options, first is the “main widgets area” when you click on this you get another list of widgets that are to be displayed in the footer area. When you click on any of the widgets a dropdown appears where you can edit more or add more.
You can add your category in the “Title” section. Check any of the required boxes. If you do not want to add any, then say “Remove”. The same goes for other widgets too.
Secondary Widget:
Here you must click on Add a Widget and you get a sidebar with a list of different widgets. Click on any and it adds up your widgets lists. if you want to add more widgets then click on Add a widget again and you can add as many widgets as you want.
Homepage Setting:
Select either the latest posts or the static front page for your site.
Social Links:
Through social links, you can add links to social websites in the header section of your website.
Additional CSS:
You can add additional CSS stylesheets to your website to change its layout and design.

1 thought on “How to Install Theme in WordPress step by step”