WordPress User Roll
In this blog, we will study the roles of Users in WordPress. Every user has a role in WordPress. Roles are like permissions given to a particular user to access the WordPress site. These roles can be allotted only by the Admin.
Here are a few pre-defined roles available in WordPress:
- Administrator: The Administrator has all the rights. An Admin can do anything and everything on the WordPress site such as creating more admins, inviting more users, and also removing them.
- Author: The Author can only write posts, upload pictures, edit, and publish their posts.
- Editor: The Editor has access to all the posts, pages, comments, categories, tags, and links. They can create, publish, edit, or delete any posts or pages.
- Contributor: The contributor can only write and edit their posts until published. They can create their posts and pages but cannot publish them. They cannot upload images or files but can see your site’s status. When they want to publish any post, it must be first notified personally to the administrator for view. When the post is approved, the contributor cannot make any changes once published.
- Follower: The Follower can only read and comment on the posts. Followers have signed in to your account to receive updates.
- Viewer: Viewers can only view your posts; they cannot edit but can only comment on the posts.
Add New User
we will see how to Add Users to your WordPress blog or website. When users register on your WordPress blog or website, you get an email notification, so you always know when new users register, and you can then get into your Dashboard and edit the Users’ role.
Following are the simple steps to Add Users in WordPress.
Click on User and then click Add New in WordPress.

You can fill the user detail on the Add New User page. Fill in all the required fields as seen in the following screen to proceed further.
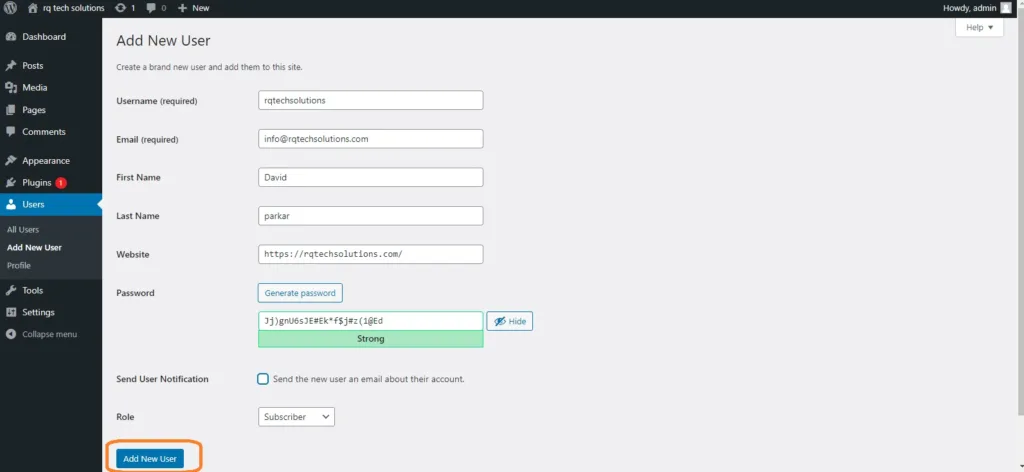
- Username *: Enter the unique username, that you want to display on the website.
- Email *: Enter the valid email address. The user receives notifications from the site at this email address.
- First Name: Enter the user’s first name.
- Last Name: Enter the user’s last name.
- Website: Enter the URL for the user’s website.
- Password*: Enter the password.
- Repeat Password*: Repeat the same password as the previous password for authentication.
- Send Password: Send password to the new User by email checkbox. The User will receive an email with the new password.
- Role: Select the particular role from the dropdown, i.e., Subscriber Contributor, Author, Editor, or Administrator.
Click on the Add New User button to add users to your users list.
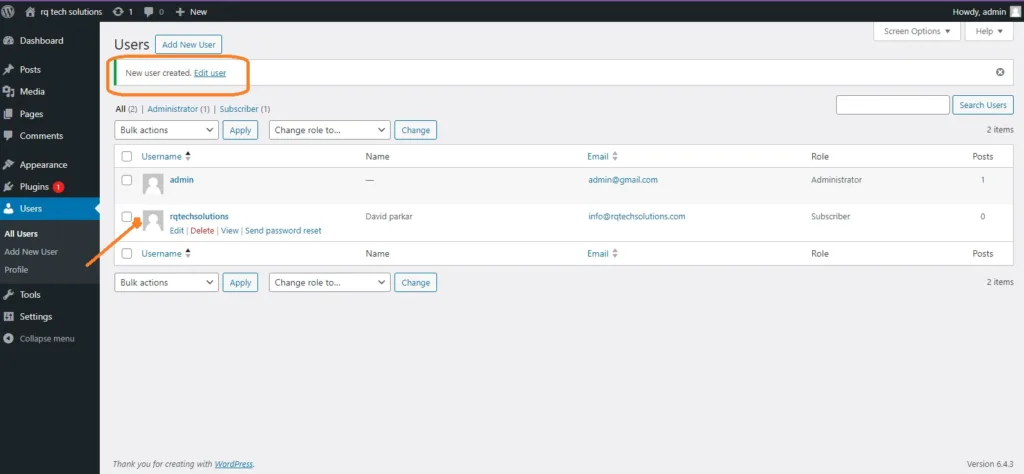
Now, you can view the user list to see whether the users have been added. A message will be displayed as New User Created as seen in the following screenshot.
User Photo
Now we will learn about User Photo in WordPress. To add user photo in WordPress, you must install plugin User Photo from WordPress plugins. It helps you add a photo of your own to your WordPress profile.
Following are some simple steps to add a User Photo.
Click on Settings and then click User Photo.
The User Photo Options page gets displayed.
Set the dimension for your thumbnails make the required changes and then click on the Update Options button.
To view the plugin User Photo is activated, go to User and then Your Profile. On your profile page you can see Your Photo section is added. Here you can upload your photo to display as a profile image.
Edit User
If you want to edit users follow these simple steps to Edit Users in WordPress.
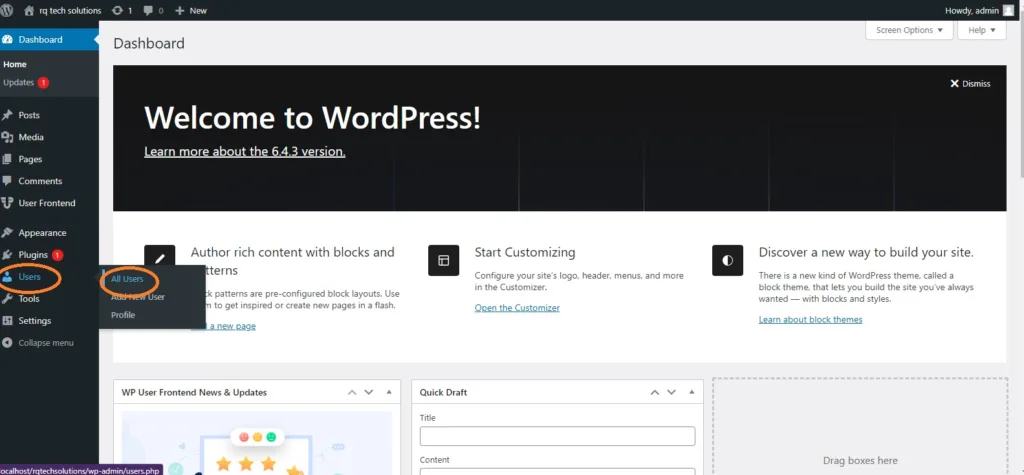
Click on Users and then Click All Users.
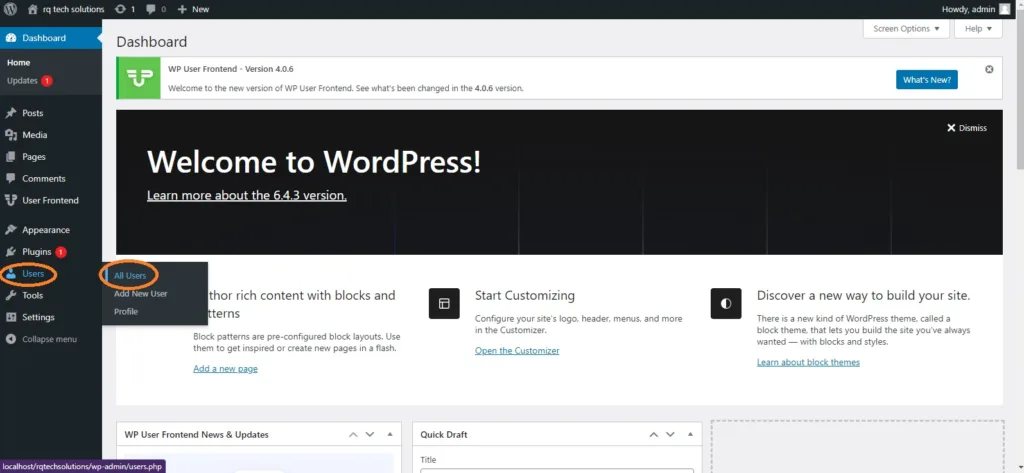
You will see a list of all Users.
There are two more tabs seen on the toolbar.
- Administrator: A list of administrators will be displayed.
- Subscriber: A list of Subscribers will be displayed.
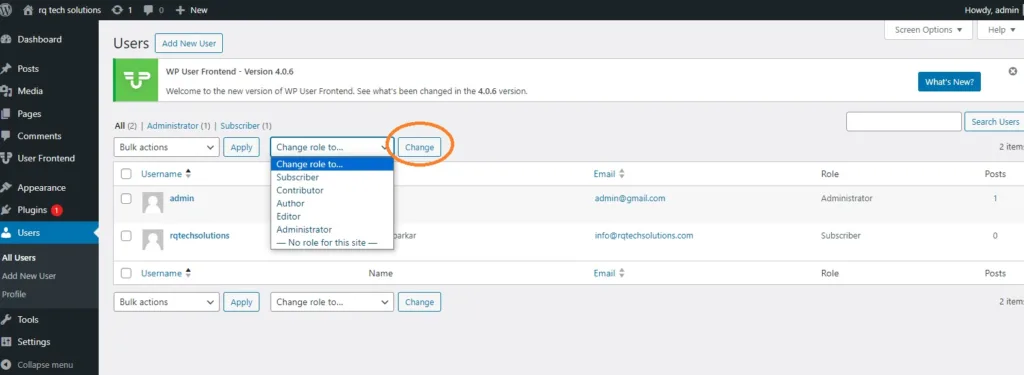
When we click on the changing role to box, a dropdown list appears as seen in the preceding screenshot.
- Subscriber: A person who can only manage his profile.
- Contributor: A person who can write and supervise own posts, but cannot publish them.
- Author: A person who can publish and manage his posts.
- Editor: A Person who can publish and manage posts, including the posts of other users.
- Administrator: A Person who has access to all the administration features within a single website.
Click on the check box of the user name to change the role of the user. Then, click on the change button and the user’s role will be changed accordingly.
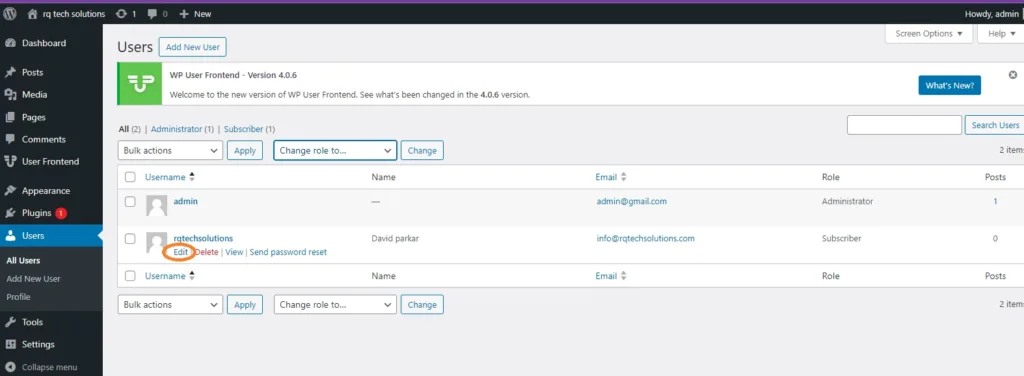
Click on the Edit option as shown in the following screen to edit the user.
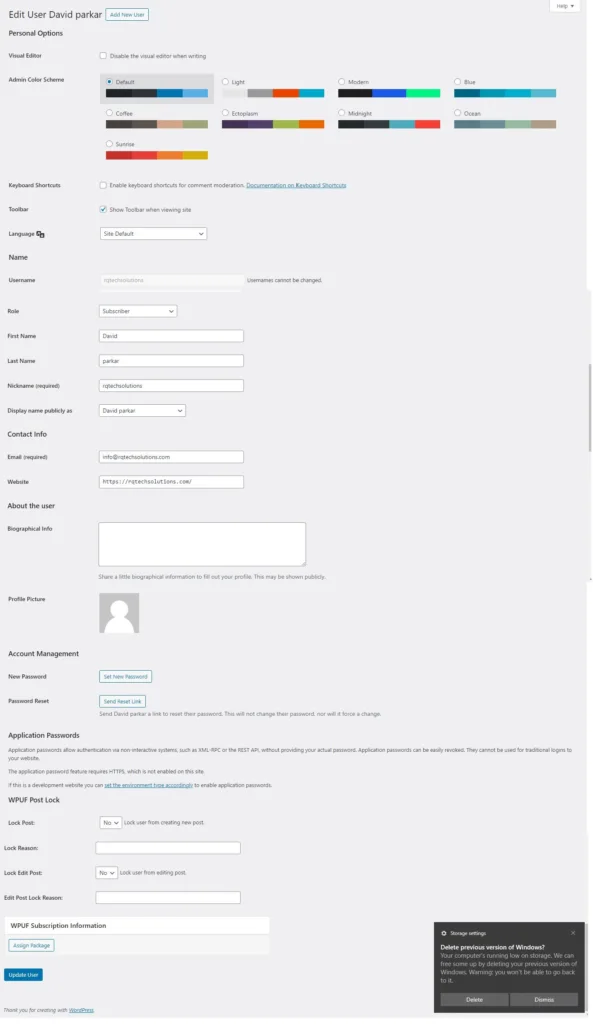
The Edit User page is displayed. Here you can edit or modify all the fields as per your need and click on Update User to save the changes.
Delete User
How to delete User in WordPress. Following are the steps to Delete Users.
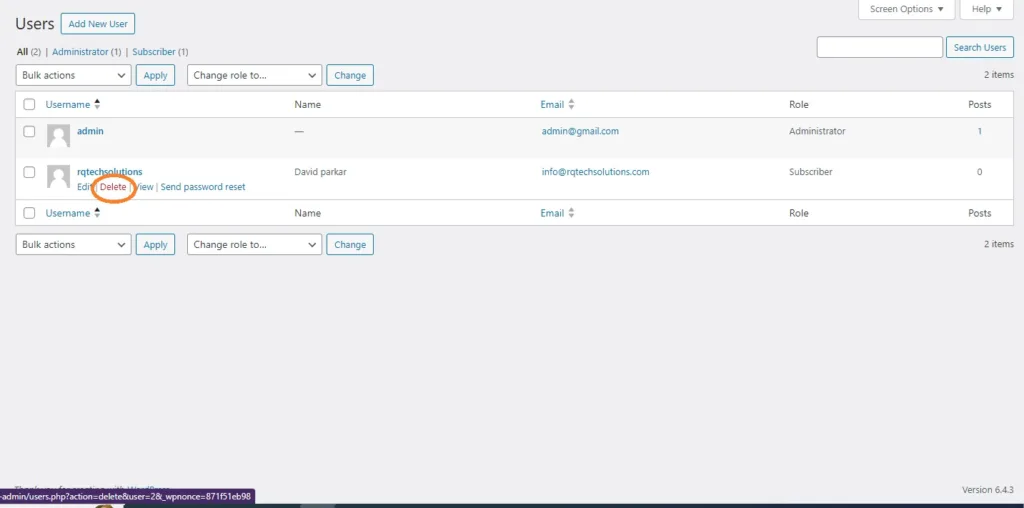
Click on Users and then Click All Users.
A list of Users is displayed a shown in the following screenshot
Select the one you want to delete. Click on Delete.
When you click on Delete you get the following page.
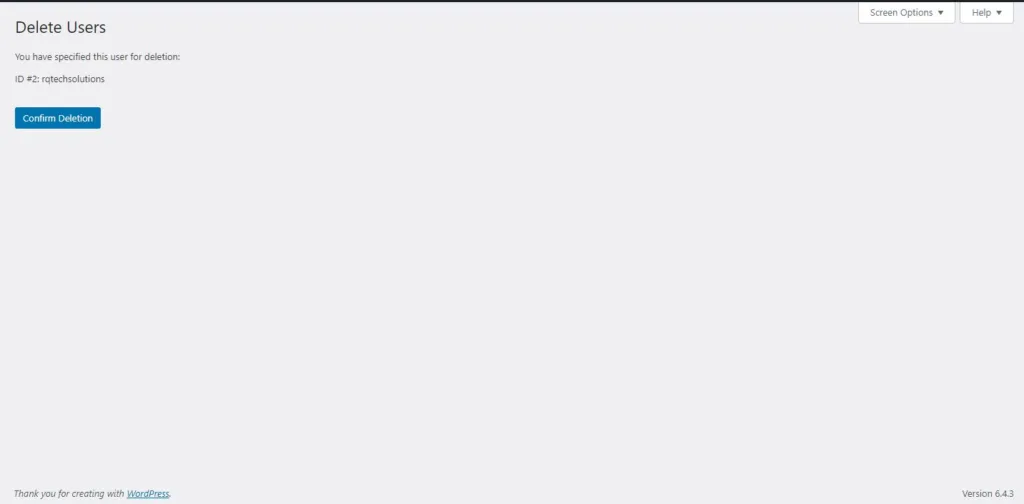
Select options as required and click on Confirm Deletion. Your user will be deleted.
We have another method of deleting users. A screen as shown in the following shot appears.
Here you can select the user to delete, check the boxes click on delete from the dropdown list, and click on Apply.
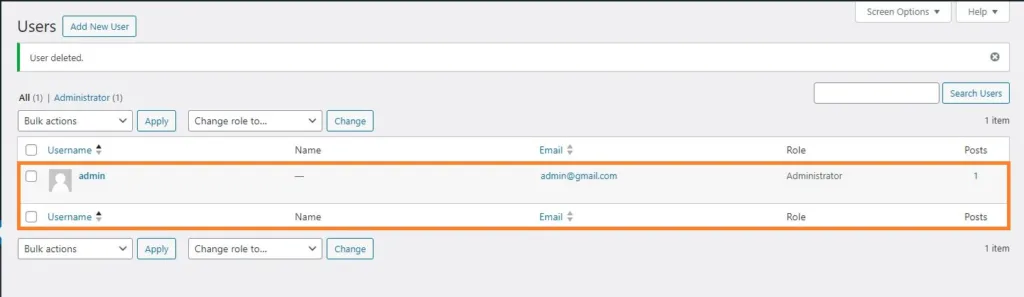
Once You click on Apply, the users selected will be deleted.
Personal Profile
Now we will see how to create a Personal Profile in WordPress.
Following are the steps to a Personal Profile.
Click on Users and then click on Your profile from the left navigation.
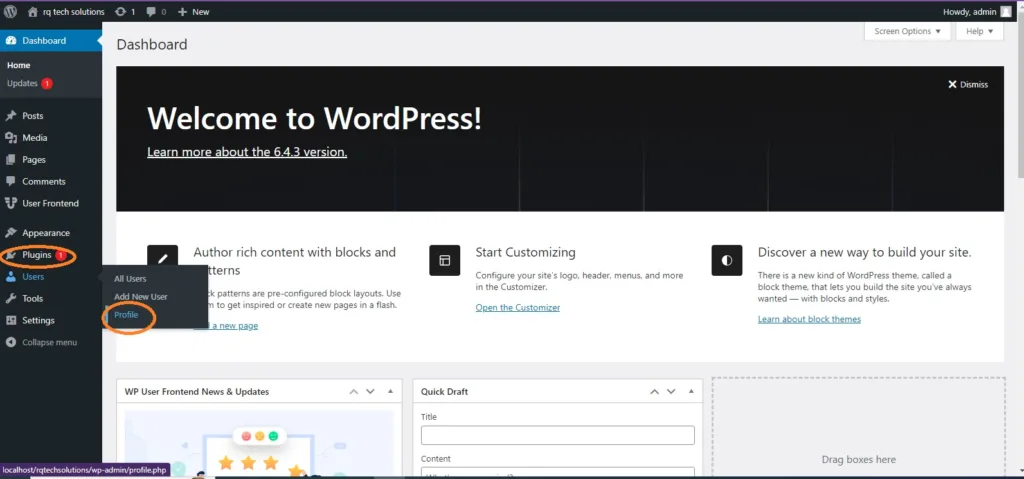
When you click on “Your profile” the following screen will be shown.
The following Personal Options appear on the screen.
- Visual Editor: While you are adding posts/pages to your site you can enable this setting if you wish to create, format, or edit your post. If you disable this setting, you won’t be able to use this option.
- Admin color scheme: You can change the color of your WordPress Site by selecting any of the following.
- Keyboard Shortcuts: If you are too fast at getting your work done and need keyboard shortcuts then you can check this box.
- Toolbar: If you check this box, you can view the toolbar while using WordPress.
Name
- Username: Enter your user name.
- First Name/Last Name: Enter your first name and last name.
- Nick Name: Enter your nick name if any.
- Display name publicly as: Check the box if you want your name to be displayed publicly.
Contact Info
- Email: Enter a valid email address.
- Website: Type in your web address.
About Yourself
- Biographical Info: Some details about you.
- New Password: Enter a password of your choice.
- Repeat Password: Re-enter the password for authentication. Password must contain 7 characters.
- Your Photo: You can upload an image of your own from your computer. This will be your profile picture.
After you have updated all the changes, click on Update Profile.