

In this article, we will see how to add tags and categories to images in your WordPress media library. Tags and categories help organize media files in a way that make sense to you. This way you can easily find the images you need.
Why we need to Add Categories to images in WordPress Media Library?
WordPress has a feature called “taxonomies” that lets you categorize your posts and add tags or custom organization types to your content. However, the default category taxonomies are available only for posts. But you can add these taxonomies to any WordPress post type, including pages, attachments, or custom post types. When you upload an image to your WordPress posts or pages, it is stored in the WordPress media library as an attachment and can have its taxonomies. Adding Categories to your WordPress images can help you find and sort images quickly. Instead of looking through the entire image library, you can just search by category . By the help this method to add categories to images in the WordPress media library.
Add Categories to images in WordPress Media Library
If you want to organize your images in the media library using tags and allow users to filter images by tag on the front end, this method will be helpful for you.
First, install and activate the Enhanced Files plugin. Then, go to Media and click on Media Categories.
If you’re unsure about how to install a WordPress plugin, this article will be beneficial for you.
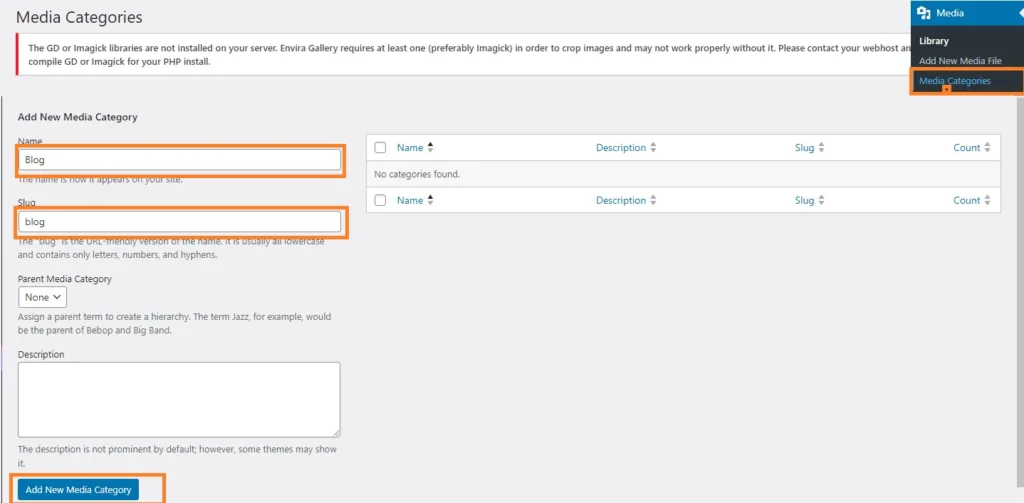
You have to click on the media categories, and after that, a page will be shown in front of you; you have to enter the name of the media category to be added first, then its tag, and then if there is a parent category. So it has to be added. If you want a description, then add it, you have to click on add new media category button.

After clicking on the add new media category button, your category will be added so that we can edit it. We can delete it; now, we have to add images to it. How do it? Let’s see.
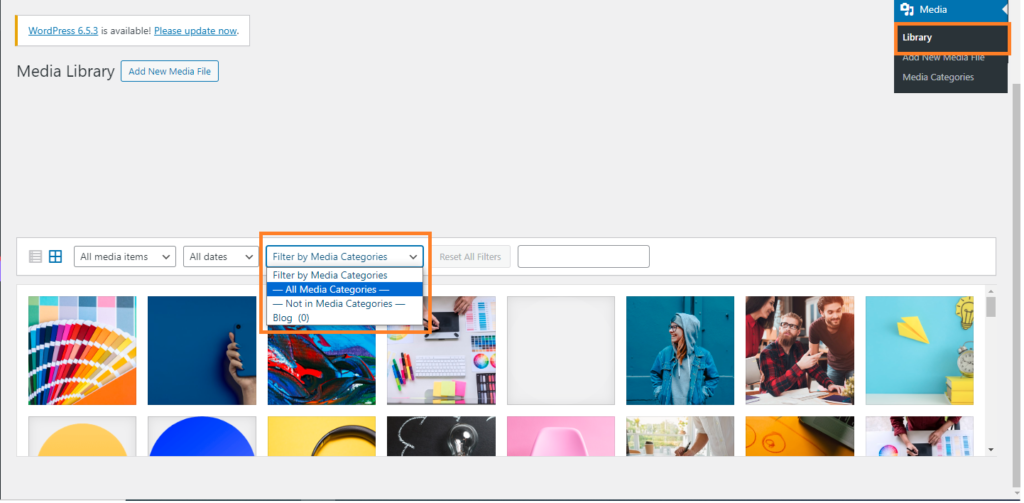
After going to media, you click on library and here are some options that are showing in front of you: all media items, all dates and filter by media categories. When you click on the filter by media category, then, the categories that you have created will be shown in front of you. Now, you can see the categories added in the name of a blog.
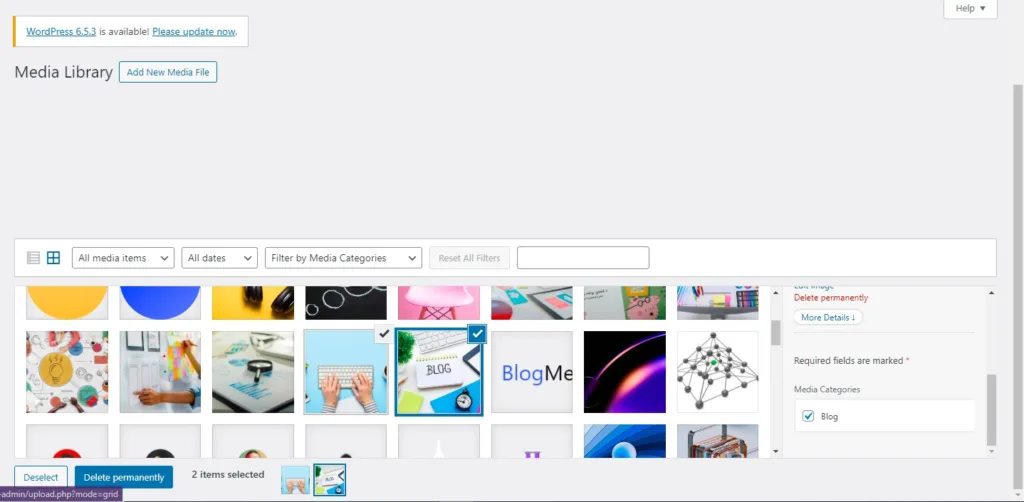
After coming here, you have to click on the image that you want to add to your category. After clicking on this image, an option will show on your right side. There, you can add a media category like I recently did. I have created a blog category and am adding to it.
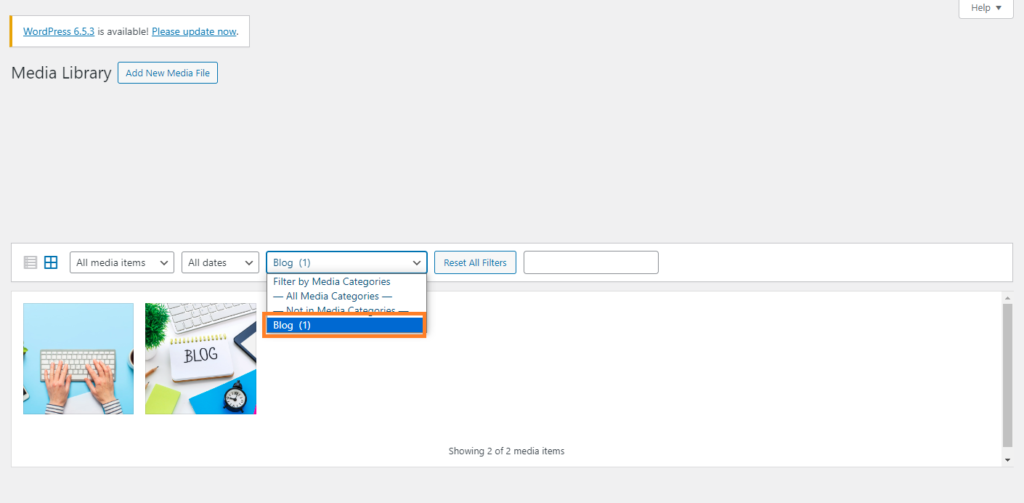
Your image has been added to the blog category, so now how do we see it? We have to click simply; after clicking on the filter by media categories, you will go to the blog option, and then these images will start appearing in front of you.
This article explains how to add categories to images in the WordPress media library. I hope it is beneficial for you. If you enjoy this article, please share it with your friends and leave your comments in the comment section if you have any questions.
If you want to watch a video tutorial on WordPress, you can visit my YouTube Channel and watch it from there.
